Tag: model


Pretty makeup, that’s what they want.

June 16th, 2016 — 12:50am

christina3  christina1

‘I want my makeup to feel light, look glowy and sheer, and basically, just make me look like the best version of myself’.

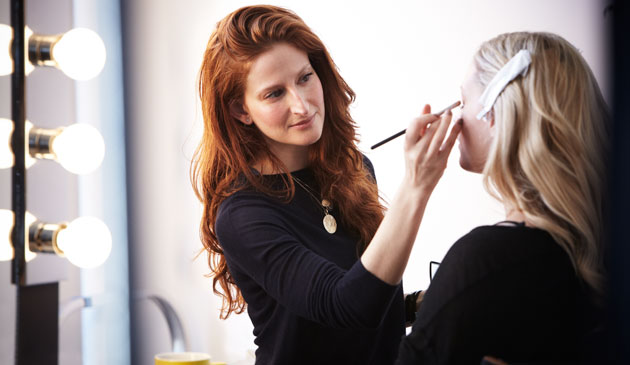
Unless I’m doing makeup for an editorial, 90% of the time this is what I hear from the person I’m about to make up.  It’s come to be my favorite kind of makeup look to create, in large part because I love watching my clients reaction when I’m finished. Who doesn’t like to make people feel good about themselves? It may be a superficial ‘feel good’ at first, but it seeps in. I watch moods change, frown lines soften, and interactions with others become lighter and more at ease.  Makeup really is transformative, and it doesn’t need to be heavy anywhere on your face, contrary to the heavy eye and brow makeup and pancake face with highlights and lowlights and contour and strobe trend that just won’t seem to go away.

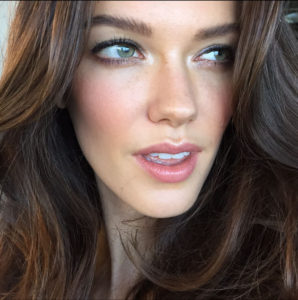
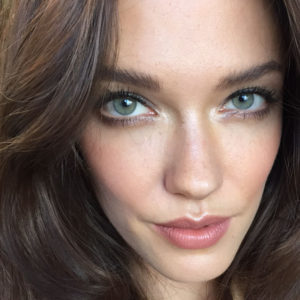
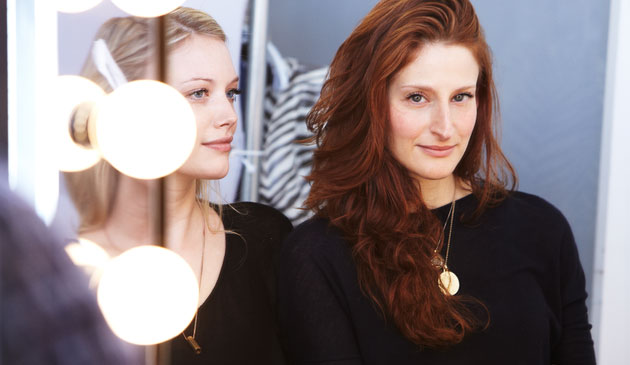
This is what I used for this light and glowing makeup on the beautiful Anna-Christina Schwartz:

Skin:

May Lindstrom Jasmine Garden Facial Mist– the scent is incredible and I use it as much for the aromatherapy for myself, as I do for my clients.

Biossance ‘The Revitalizer’ – a super light squalene moisturizer that’s good for all skin types.

Kjaer Weis Foundation – I use a fluffy eyeshadow brush to gently buff the cream into skin – the smallest amount around her nose, on her forehead, and around her eyes, patting it in with a damp beauty blender.

RMS Living Luminizer – not a surprise, I love to use this coconut oil based highlighter on the cheekbones, along the bridge of the nose, and the cupids bow.
Eyes:

I lined her eyes gently with cream shadow sticks from Ilia Beauty, in a gold/brown called ‘Age of Consent’, and a bit more heavily with ‘You Spin Me Round’ – a dark gray/black shade. I blended them in with a cotton swab so they melted into the lash line – both top and bottom.

Ilia Polka Dots and Moonbeams luminizer – I press this more dense, less emollient (than the living luminizer from RMS) highlighter into the inner corner of eyes to draw attention and make eyes dazzle even more.

I always curl the lashes at least once, focusing on getting that outer corner UP! It really makes eyes stand out. Two or three coats of a very black mascara on top, and one slight coat on the bottom lashes finishes the look.

Brows: Eco Brow in ‘Sharon’ lightly filled in her brows, and I used a cotton swab to ensure no hard edges. I brushed her brows up and held them in place with a little liquid (non-aresol) hairspray from Rahua on a spoolie brush.

Cheeks:

I usually use cream products that I swirl on the apples of the cheeks, but for this look I experimented by mixing a powder blush with a powder bronzer. For this I used ‘Blushing Rose’ and ‘Soft Terracotta’ from Dr. Hauschka and a medium sized fluffy brush.

Lips:

Gressa Skin ‘Bare’ Lip Boost over a bit of balm from R.L Linden. 

Comments Off on Pretty makeup, that’s what they want. | ...Here's how to

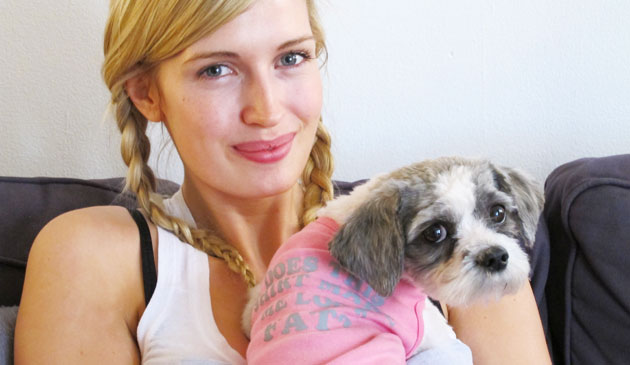
Meet Camilla, foster dog mom extraordinaire (and gorgeous plus-size model), & Polly, the 33rd pup Camilla helped find a forever home.

April 16th, 2013 — 1:12am

camilla1

There are a number of things that make me cry, and going into the dog pound is one of them. When I was 16 I used to drag my friend to the local animal shelter every so often, and sit next to the cages and tell the dogs how much I loved them. It always broke my heart to imagine the stories behind how they wound up locked inside the cold metal cage bars, and I would leave with my black cat-eye eyeliner and mascara smeared down my cheeks. My family’s first dog came home with my mom from a shelter soon thereafter: a blonde 5 year old cocker spaniel who we named Lucy, aka Woobie, whose furry snout I can still feel on my lips.

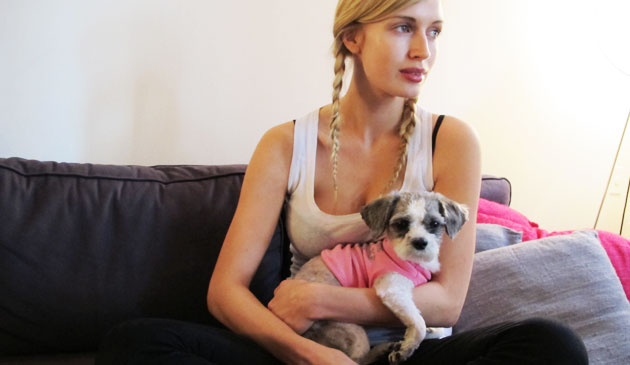
Back to Camilla and Polly. You may recognize Camilla’s amazing lips from my earlier post here, but in that post I didn’t share with you that in addition to being a model with Muse Models here in NYC, this stunning young Danish plus-size model has found the time to open her home and serve up love to 38 foster dogs over the past two years, which is really remarkable considering the amount of time she spends flying around the world for photo shoots. The day I photographed her lips I also took a bunch of shots of her with Polly, as the two were just getting to know one another. Note: Polly’s sweatshirt reads: does this shirt make me look fat?

I asked Camilla to tell me more about how she came to foster dogs,and what becoming a dog guardian – while working towards placing them with their new parent/s – entails.

What made you decide to become a foster mom?

I’ve always had a big love for animals, but despite many attempts to convince my parents to let me get a dog, it never happened. I promised myself I would get a dog the moment I moved away from home, but once my career got going, I realized and accepted that I simply wouldn’t have the necessary time to give a dog full-time. When I came to NYC 3.5 years ago, my desire to have a dog hit me really hard, and I knew I wanted it to be a rescue. After wanting to save all the dogs I met at an adoption event, I started talking with some shelter volunteers about my interest in adopting vs the actual time I would have to devote to it. It was at that event that I was first encouraged to foster, and it was explained to me that if I had to leave the country for a job posh pets  would let me bring the dog to another foster home. I loved the idea of helping to rehabilitate a dog, and to be involved in the process of finding it new owners. The following month I picked up my first foster at the local kill shelter. She was as sweet as can be, a 3 year old Bichon Frise, who I named Rose. She gave me a little kiss on the cheek as I carried her out of the shelter, and since that day I can’t imagine my life without a dog.

You’ve fostered so many dogs! Do you remember Polly’s story?

When I started fostering I used to say that it was unfortunate that I didn’t know the dog’s life story, because the majority of the time we really had no idea how they came to the kill shelter. As I became more experienced, however, I realized that “unfortunately” wasn’t a good word to use because very often the situation from which they came was just so awful, I didn’t want to know.

The fact is, most dogs end up in shelters because of neglect; whether it was because their owners didn’t bother training, exercising, or grooming them, or that they physically or emotionally abused them – it’s all neglect. Even if the owner gives a reason for surrendering the dog, 90% of the time, it’s untrue. I’ve had fosters that were as sweet as can be, and when I read their intake papers, reasons for surrender to a kill shelter are sited as ‘dog is aggressive’. Sometimes people will also say that they’ve found the dog as a stray to avoid paying the $20 owner surrender fee charged by the shelter.

The few times that I have known the reason for why a dog was given up, I wasted a lot of energy on being angry. I once fostered a 9-month old Yorkie named Drake who was surrendered because the owners had gotten him “as a toy for their 5 year old daughter”, and when they realized how much time and attention he required, they didn’t want him. That kind of thing happens so often.

What would you like people to know about fostering?

Anyone who’s considering getting a dog should foster first because it’s a great way to see if you’re willing and able to change your lifestyle to accommodate a dog. It’s a big responsibility, and takes a lot of time and energy to make sure that your dog is a happy, well-behaved, and well socialized animal. It’s also a great way to test to see if a dog is a right fit for you – something that’s difficult to do in within the 10 minutes you may spend with a dog in a store or a shelter before taking them home.  Even if the foster dog isn’t the right fit for you, you can help it by making sure it’s adopted by the right people – sometimes you have to kiss a lot of frogs before you find the prince…kind of like dating!

Is it expensive to foster?

It’s all relative because it’s not cheap, but still much less expensive than having your own dog. You pay for everything that goes on in your home – beds/food/toys, etc, because shelters have very limited funds. Usually they’ll pay for a groomer and vet appointments + medicine. Keep in mind that anything you buy for the foster dog (in most cases) can be used as a tax deduction, because they’re considered a donation. Even if it can’t be deducted, though, it’s still worth it because every penny you spend you’ll get back ten times in love and kisses from the dog.

How do you help find new homes for your foster dogs?

People send in applications when they see the dog they like on a rescue website like petfinder.com or adoptapet.com, and then in my case, the ower of Posh Pets goes through all of them and forwards me the ones she thinks might be a good match based on what I’ve told her about my experience with the dog after I’ve gotten to know it for a few days. From there I set up appointments to interview the applicants and witness their interaction with the dog. 

I would like to note that very often I meet with a lot of great applicants before finding the right match – which means I turn away prospective dog owners who I know will be great dog parents, but just not for the dog I’m trying to place. I say this so that anyone who’s applied and not been approved knows not to give up!

Finally,  have to say,  another great thing about fostering happens when I bring the dog to be groomed after years of neglect. On the way there the dog usually walks around like you or I would when we feel depressed, because on top of the matts in their fur hurting them, they’re also mourning the loss of their previous life, even if it wasn’t good. Then, when I pick them up after they’ve been groomed, they somehow seem to know that they look and smell good and that their new life – a life full of love – is about to begin. It’s so beautiful to see and brings tears to my eyes every single time.

Where is Polly now?

She lives in the suburbs with a mom, dad, 3 human brothers, and 1 dog sister. They have a huge backyard – and she loves digging in their garden. Her dad rides a Harley, so she sits in a bag on the back of that, and they also have a boat, so she’s been enjoying sailing in the summer.

Sounds like you found Polly a wonderful new life, Camilla!

You can check out more of the sweetheart pups Camilla has fostered on her website: camillahansen.com  (she’s also a great photographer – their pics are so cute)

Thank you so much, Camilla!

One last thing: Camilla’s 39th foster pup, Baxter, became her forever pup! Congratulations to the whole family!

comfy_polly
camillakissespolly
camilla2
polly_on_the_floor

Comments Off on Meet Camilla, foster dog mom extraordinaire (and gorgeous plus-size model), & Polly, the 33rd pup Camilla helped find a forever home. | ...We're all connected

show off your love for spring with a pretty pink pop

March 8th, 2013 — 5:38pm

angelahighsmithforblog

It’s always a real learning experience for me when model Angela Highsmith sits in my makeup chair.  Early on we discovered our shared passion for all things natural, and my respect for her body of knowledge grows every time we spend a day on set together.

At some point she told me that she brews up a tea for her daughter (this youthful beauty is a mom to a 10 year old) from an herb called Skullcap to ‘help chill her out before school’, and then went on to tell me about her herb garden and all the concoctions she makes to treat cuts and bruises from what she has growing in her own back yard. I recently introduced skullcap tea into my repertoire of ways to chill myself out and get ready for bed… and it actually does the trick!

Her knowledge of making her own medicines doesn’t stop there: she treats a variety of sensitive skin issues with oils, salves, and cold creams made with her own two hands, and a wealth of information she received during the many classes she’s taken at the New York Open Center, and in one-on-one sessions with herbologists.

When I asked her how she became interested in herbs, and the world of natural beauty products, she told me that she’d been interested in natural healing ever since she was a little girl, and that she used to make believe she was a Native American living off the land, with only what she found in her yard to eat, and to survive. As she’s gotten older, she explained, the natural products she uses become more and more natural: from using store-bought products with naturally derived ingredients, to focusing on searching out organic and edible products for skin and hair, to now making a good number of what she and her family uses, all by herself.  Very crafty and smart of you, Angela! Can I come over one day and see your garden?

On the day of this photo shoot I created a naturally glowing look with the following products – and even the most discerning green beauty aficionado would approve:

1.     Amala cocoa bean face oil massaged into Angela’s sensitive skin

2.     Vapour Organic Beauty liquid foundation used sparingly, starting from the center of the face, and blending outward

3.     Mineral Fusion concealer under her eyes very sparingly

4.     RMS cream eyeshadow in ‘Seduce’ on just her lids, applied with my fingers

5.     Onto curled lashes I applied a few coats of Honey Bee Gardens mascara in black

6.     Dr Hauschka bronzing powder swirled along her temples and across her cheekbones

7.     Burt’s Bees lip shimmer in Watermelon topped with a light coat of Burt’s Bees lipgloss in Spring Splendor

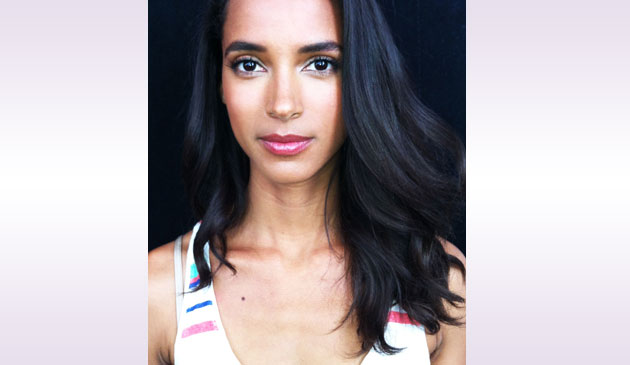
We both loved this fresh, gorgeous look (with just a pop of lip color) so much, that I thought to take a photo of her at the end of the day after she’d changed back into her street clothes. Can you believe this shot was captured at the end of an 8-hour day on set? Just beautiful, Angela, just beautiful!


Comments Off on show off your love for spring with a pretty pink pop | ...Here's how to

show the world that less is more: super basic makeup 101.

December 24th, 2012 — 5:12am

miniblog

photo: Tim Bell

This is my beautiful friend, Mini Anden.  To have a conversation with her, you’d have no idea she was born and raised in Sweden because she doesn’t have a trace of an accent. We’ve known each other for a number of years now, and I absolutely adore her. She’s really intelligent, we have the same sense of humor   (I love it when she cracks us both up while I’m doing her makeup), and she’s a great listener and advice-giver. All of that mushy stuff aside, she’s an incredible model, and at just under 6 ft tall with a body that she subjects to intense workouts including a fusion of pilates and boxing known as piloxing (she has serious abs that I’ve actually tried punching just to see how strong they are – and they kinda hurt my hand!), she’ll have a career in front of the camera for as long as she wants.

She’s also a totally natural beauty. I really prefer how she looks mostly bare-faced, unless she’s been made up for an editorial photo shoot in a magazine with really intense makeup. Her eyes are incredibly blue, in that almost unreal, is-she-wearing-colored-contacts? way.  She’s also a perfect freckle-face, with tons of cute dots all over, although the size of this photo doesn’t let you see just how intense they are.

We shot the photo above after a long day on set, after she’d taken off most of the makeup I’d put on her for the day’s shoot. As you likely know from the makeup I do, I like to accentuate the beauty that already radiates from each woman, rather than drawing her a new face on top of the one that exists. In Mini’s case, I wanted to show how just a little eye makeup and slight skin perfecting makes for a polished look.

We did a very basic touch up before putting her in front of a window, against a white wall with no fancy lighting or makeup tricks used.

The products I used were:

Toning Mist, Kahina Giving Beauty: I had Mini close her eyes, and on her freshly washed face, I generously sprayed this mist to help replenish moisture and calm her skin.

Facial Lotion, Kahina Giving Beauty: I’d already given Mini a face massage with oil earlier in the day, so for this photograph I opted to use a less dew-inducing option, while still offering great hydration.

Shu Uemura Eyelash Curler:  I know many people are scared to curl lashes once they’ve been coated with mascara, but if you do it carefully, and just barely tap the curler when you’re holding it just at the root, you’ll be fine. NO TIGHT SQUEEZING here, please. You’ll take off the mascara where the metal touches your lashes and have a blank space that no amount of recoating will really help cover.

‘Cloud Nine’, Kjaer Weis Eye Shadow: This is one of those really flattering (for fair to medium complexions) champagne/ivory shades with a pearly finish that does a great job of illuminating the eye without leaving behind those horrible bits of glitter. Using this MAC brush I like to place the eyeshadow in the inner corners of the eye, in the very center of the lid, and trace a bit underneath the bottom lashes. I then use my clean finger tip to gently blend the shadow into the skin in the inner corner, and generally I’ll use this brush from Laura Mercier to buff the shadow into the lid.

Black Eyeliner, Vapour Organic Beauty:  Just a light smudge of an eyeliner swiped and pressed into the under side of the outer edge of the top lashes, and then wiggled in between the lashes, and maybe even just a teeny bit smudged on top of the outer edge of the upper lash can do a lot to emphasize the eye without making it look made up.  Depending on the shape and color of your eye, you might find your eye looks best with the entire inner rim lightly darkened, but for most almond shaped eyes, accentuating the outer upper lash line is just enough.  You can try this look with a brown, gray, taupe, or even purple or navy liner to see which you like best.  Different colors will accentuate your eye color ; for me a dark purple liner will not so much read as ‘she’s wearing purple!’, but will simply make the green of my hazel eyes pop.

Very Black, Lash Blast Mascara by Covergirl: I love dark black lashes, even if it’s just a light coating. As I’ve said countless times, this mascara is super black (whereas so many others are more of a light black, almost gray), and can be layered for a more intense look. If you read my blog because you’re looking for only ‘green’ beauty recommendations, I apologize – this isn’t one of them!

Concealer, Mineral Fusion: I like these concealer duos because similarly to the much acclaimed Laura Mercier secret camoflauge duos, you can blend different amounts of the two colors together to get the exact shade you need for the specific part of your face on which you’re laying the product. Under your eye, for example, you’ll want to use a high concentration of a peach/orange concealer to combat the purple – trust me, it totally works. I’ve used straight orange pigment to cover super dark circles under the eyes of women with very deep complexions with great success. Then you blend the more skin-colored shade over top and pat with your ring finger to create a seamless cover on the skin.

On most faces I concentrate on coverage under the inner 1/3 of the eye (never put concealer under the outer 1/3 of the eye unless you want to accentuate your fine lines and wrinkles!), underneath, and around the outer edges of the nostrils, and on any spots or redness/discoloration you may have, but only if you ensure you’ve blended both the color and texture into your skin so that you’re not just highlighting the spot.  For small blemishes, using a really tiny brush like this with a concealer that matches your skin exactly can be helpful.

Bone Beige, MAC sculpting powder: I often swirl this underneath and on to cheekbones as a sculpting powder and I like it, as well, as a non-shimmering bronzer. On Mini, I lightly underlined her cheekbones with Bone Beige using this contour brush.

Freja, Luminous Shimmer Blush, by Alima Pure: I’m usually against products with particles of glimmer, but in this case, they’re really very small, and the color and glimmer combine nicely to give a very-barely-there-pink to the apple of the cheek.

Honey Lip Balm, Burts Bees: Mini put this on herself, as per usual. Ever since I can remember, I’ve seen Mini with this little yellow tube in her pocket, purse, or hand. I can honestly say, it does her lips right, and I’ve never seen them chapped!


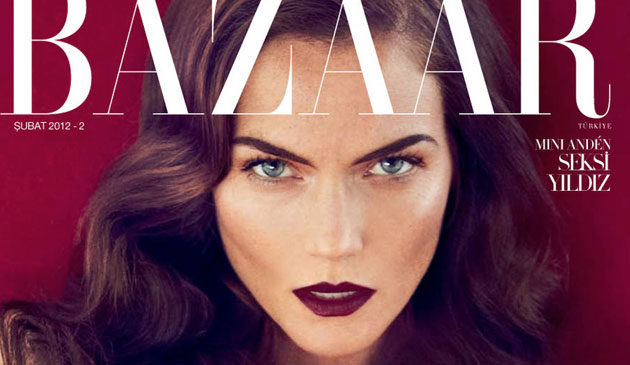
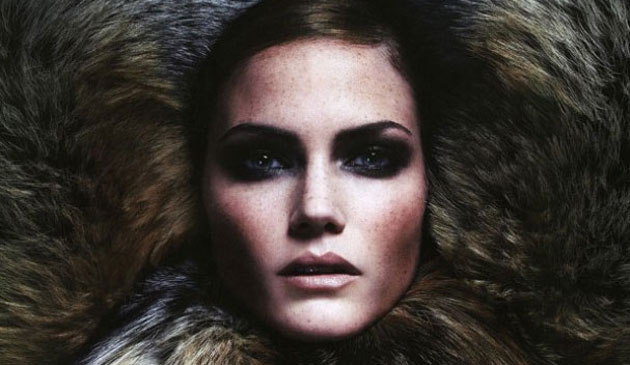
Just for fun, here are two shots of Mini that I love that really show how transformative a little makeup/hair/styling can be. Note her dark eyebrows in the first one. They look incredible for this photo, but would look shocking if you ran into her at the grocery store looking like that.
minibazaar

minifur

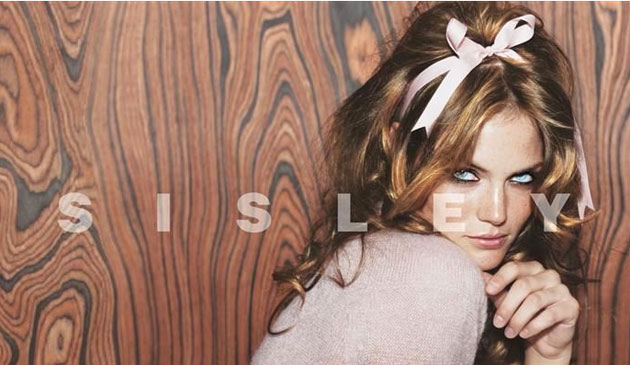
minisisley


One last endearing thing I’ll leave you with about Mini is that she and her husband, Taber, have a house full of dogs. Mini tweets pictures of them in various positions that make me laugh and laugh. I took an immediate liking to Gus, the skinniest, long-nosed munchkin in the center of the first photo; i think it’s because we resemble one another.


minipupsinsunshine minicincodemayopup minipupsoncouch minixmaspup

Thank you, Mini, my love!!!
 

Comments Off on show the world that less is more: super basic makeup 101. | ...Here's how to

wear a bold holiday lip like Eugenia

November 24th, 2012 — 12:23am

photos: Tim Bell

I count this multi-lingual, timeless beauty, model, attorney, farm and restaurant owner,  daily blogger, and columnist for HELLO! magazine  (how does she find the time??!) – Eugenia Silva – among my favorite faces to paint on, and wonderful friends. We’ve shared a lot over the years we’ve known each other, including a love for the best products. Luckily for me, she’s as excited by the green beauty industry as I am.

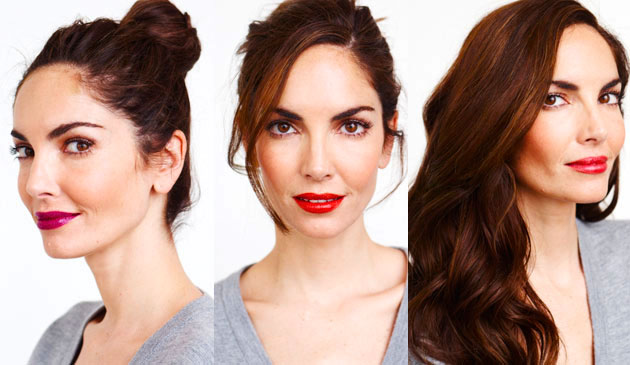
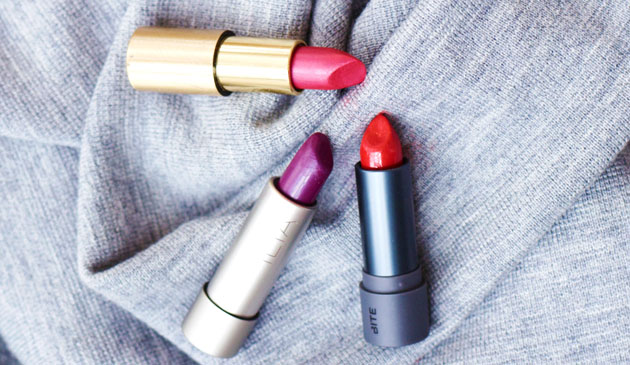
When she asked if I wanted to do a blog post together, I jumped at the chance. With plenty to pick from, Eugenia and I dug through my huge bag of non-toxic lip colors. Our oooh’s and ahhh’s were particularly loud when we came across each of these three colors pictured here. It helps that with her coloring, she can wear most shades.  Side note: she did her hair changes in two seconds between shots. This chica is a serious model! After the long day of shooting advertising, Eugenia still looked wonderful, so we grabbed the fantastic photographer, Tim Bell, and within 30 minutes, our photoshoot was complete (and stunning!).

Look #1:  Ilia Beauty in Ink Pot – has a silky, satin finish with just enough emollience.

Look #2: Bite Beauty in Apricot -doesn’t look like any apricot I’ve ever seen! it’s a richly pigmented orange-y red – not shiny nor matte, but the perfect blend of creamy.

Look #3: Dr. Hauschka in #13 – a very lustrous richly pigmented PINK with a modest amount of reflective particles to really make your lips shine without being glossy.

With colors so intensely pigmented, bright, and moist, application technique is important, particularly if you don’t want to have constant touch-up worries. There are lots of techniques that will help your lip color to stay strong all night, but one of my favorites (and it doesn’t necessitate finding the perfect lip liner to coordinate) is as follows:

1. Begin with moisturized lips. Now blot them with a tissue to remove any wax or oil sitting on your lip skin.

2. Using a lip brush, begin building up product by swiping both sides of the brush against the lipstick.

3. Begin by tracing the outer edge of the bottom lip with your lip brush, depositing color densely and evenly.

4. Trace the cupid’s bow (center of top lip, directly underneath the nose) with the lip brush. Stand back from the mirror and see if your top lip would benefit from being traced just slightly above the actual lip line. If you’ve never done this before, give it a try and see if you like how it looks (many of us start to lose a little fullness in our top lip in our late 20’s), and wipe it off immediately if it makes you look clownish. Finish tracing the edge of the top lip, whether inside your natural line, or just outside. Stand back from the mirror again and make sure what you’ve drawn is symmetrical, and if it’s not, try and get it as close as possible.

5. Reload your lip brush with lipstick and begin pressing the color  – not dragging it – evenly into your lip. Press your lips together – don’t rub them, though. The goal is to press the pigment into your skin, which will stain it = making the color last longer.

6. Repeat step 5

7.  Place a single sheet of tissue between the lips and press them together to blot – again, do not rub, only press.

8.  Using a translucent loose powder, gently tap some into your palm or onto a tissue, and using your ring finger, press a very light coat onto your lips. Press your lips together one more time to bind the powder to the lipstick.

9. Finish with one more application of your lipstick. This can be done with your lip brush, with your finger – by touching the lipstick with your ring finger, and pressing it into your lips – or by tapping directly from the tube onto your lips. The point of this final step is to ensure that the intensity of color is there, and that the finish is emollient and even.

I know it sounds like a lot of steps, but I’m telling you, when you don’t want to think about retouching for hours, this is the way to go. Regardless – don’t forget to pack your lippie in your handbag. You never know what activity you might find yourself in that will smear your perfect pout. Wink wink!

Gracias, Eugenia!!!


Comments Off on wear a bold holiday lip like Eugenia | ...Here's how to

VOGUE.com features my guide to going green for Spring!

April 19th, 2012 — 11:08am

I couldn’t be more excited to share this article from Vogue.com:  Makeup Artist Katey Denno’s Guide to Going Green for Spring

I really believe in the brands I recommend in the article, and have actually had the pleasure of getting to know some of the people behind the different product lines, as I always want to know the story-behind-the-story of how they got their start, and what keeps them going.

A HUGE thank you goes to the beautiful and brilliant Catherine Piercy, Beauty Editor at Vogue.

Thanks to photographer Jason Brownrigg for snapping these shots while I was working last week, and to the lovely model McKenzie Raley for sharing the photo with me.


Comments Off on VOGUE.com features my guide to going green for Spring! | ...I love this

A Valentine’s Day Follow Up: Your chest is where the heart is

February 21st, 2012 — 1:59am

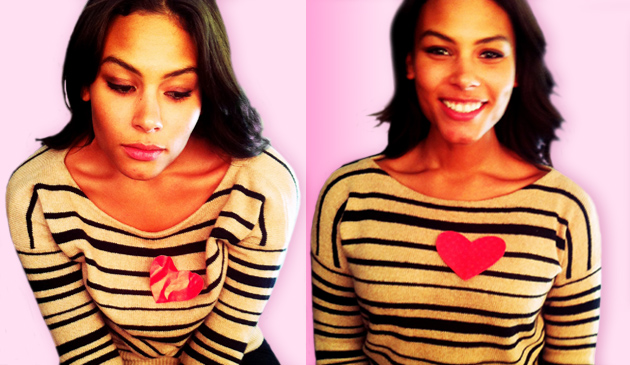
The beautiful model, Marquita Pring, demonstrates what happens to our pumper when we’re slouched.

This post isn’t so much about the heart, or about Valentines Day. However, since the holiday just passed, it got me thinking about the heart, as well as other internal organs. It also got me thinking about what makes a stranger appear attractive, which led me to think about posture. Then I envisioned what happens to a heart when a body is slouched over. It must get all compressed, right? All our organs must just squish together when we slouch. Not only is slouching bad for us on the outside, i.e. how it makes us appear, as well as the effect it has on our spine, but it’s got to be bad for us on the inside then, too.

This all went through my mind in about 30 seconds

So how’s your posture right now? Is your chin parallel with the floor? Are your ears, shoulders, and hips in one line?  Are your feet planted evenly on the ground? Are your shoulders relaxed away from your ears, with your  shoulder blades reaching towards one another, gliding down your back?  Yeah, me neither.

Try this little exercise to get in alignment: push your shoulders forward, then bring them straight up, then straight back, then straight down. Does it feel good? Does it hurt?

I can’t tell you how often I say to the models in my makeup chair  “sit up really straight”, or “get really tall for me now”, and even “do you see how slouched you are right now?”  I guess it’s a sign that they’re really relaxed, which makes sense because I always give a little face massage to get them feeling good and ready for me to hold their faces hostage while I paint on them. I mean, we all know that most models have great posture when they’re being photographed. The way they hold themselves has a lot to do with our perception of how attractive they are, and ultimately how attractive they’ll make the item they’re selling appear. Good posture is innately attractive.

When I was a kid, my dad used to do that thing where he ran his fingers down either side of my spine to remind me to stand up straight. Just looking at him was usually enough of a reminder; my dad has the best posture, and luckily he passed that on to me and my brother. Thanks, Dad!

Top 3 Benefits of Maintaining Good Posture

  1. You will breathe better! This oxygenates your entire body, giving you a more sharp and clear mind, better motor skills, and an improved mood. This is why yoga and meditation are all about the breath.
  2. You’ll avoid numerous health complications like slipped and herniated disks, backaches, poor blood circulations, neck pain, headache, and poor muscle control.
  3. You’ll improve your image in the eyes of others, and you’ll feel better about yourself. You know it’s true: people with good posture look more confident and therefore more attractive. You’ll notice the difference in how others relate to you pretty immediately.
Check yourself before you wreck yourself:
  1. You’ve heard it before, but it’s a good one: envision a string that begins in your spine and exits through the crown of your head, leading towards the ceiling. Focus on keeping your spine and head aligned with the string while relaxing other parts of your body. Stomach muscles should be engaged, but not sucked in too tightly that they constrict you taking in a full breath.
  2. Stop doing the things that cultivate bad posture, and focus on the things you can do to keep yourself in good alignment:
    a. Stop sitting on the edge of your seat! Put your bum all the way to the rear of your chair, where the seat and the back rest meet.
    b. Get a good quality chair and a back cushion if you’re sitting at a  desk for more than an hour a day.
    c. Ground both of your feet while standing or sitting. Are both of yours on the floor right now?
    d. Engage in activities that are good for your back: pilates, yoga,stretching.
  3. Lighten your load! Stop carrying heavy purses and shoulder bags on one shoulder. Your poor shoulder! Try thinning out the contents and move the essentials into a bag that you wear across your body.
  4. Don’t allow your technology to round your shoulders. Make sure your computer screen and keyboard are at a height and angle that contributes to good posture, and always hold your smart phone at face height and keep your shoulders back and down while texting. You may think it looks stupid, but you won’t be the one with neck and shoulder problems!
  5. Finally, treat yourself to a head, shoulder, or back massage as often as possible (could be from a friend, but preferably from a trained professional). Retraining yourself to have good posture is exhausting and generally hurts for the first little while. At the very least, give yourself a massage by laying on the floor ,on your back, and gently rolling yourself over a tennis ball, concentrating on the stiff parts.

There are countless web sites dedicated to teaching you how to achieve good posture through step by step directions. You can take your pick from written, pictorial, and video instructions. If you’re not 100% sure you’re employing good posture, come on, what are you waiting for? Your heart and your lungs to fuse into one?

Comments Off on A Valentine’s Day Follow Up: Your chest is where the heart is | ...It's your body

Natalia and the Smokey Eye

February 20th, 2012 — 6:00am

I’ve loved Brazilian model Natalia Costa since I first met her almost 5 years ago on what’s called a ‘test shoot’. For those unfamiliar: a test shoot is when a hair / makeup / photographer / model get together with the hope that they can create images that they’ll be proud to put in their portfolios.

Generally this is not the case, because often one or more of the parties are usually still really new to their craft and when one element is off, whether it’s hair, makeup, modeling, photography – it makes for ‘it’s almost good, but not quite’ pictures. This wasn’t the case with my test shoot with Natalia, despite all of us variables being really new to the industry.

I even credit those pictures of her as being part of the reason my agency signed me. I don’t ‘think it’s possible for a bad photograph to be taken of this woman. I chose her to make this, my first how-to video for my blog, both because I love the way she looks – particularly because she has the perfect large, almond shaped eyes for a makeup instructional film- and because I love her for who she is. I also think it’s super adorable that towards the end of the video, her alluring accent has her saying that she was “cheesed” instead of “teased” about her eyes.

There are countless ways to accomplish a smokey eye. I’m sure I’ll post a number of other techniques in the future, so that you can pick the one that works the best for your eye shape and your ability to work with shadows/liners/brushes/your fingers. A smokey eye can come in any color, density, and a multitude of shapes.

This one was created with:

  • Eyelash curler: Shu uemura
  • Shadows: Chanel quad, Mac Carbon (a medium black that’s easily blendable for that smokey look)
  • Mascara: Covergirl lash blast, the orange tube, in very black
  • Eyeliner: Georgio Armani, black (the formula is creamy and blendable, which is important for this look)

And I used these brushes:

  • MAC #239 Eye shader brush to build up the base light color all over the lid.
  • MAC #219 to draw the shape with the dark shadow.
  • Smashbox  Definer Brush# 15, which is a little fluffier and more dense than the MAC 219 brush, which will help diffuse the edges of the shape you’ve drawn with the dark color, and to pack on more dark color where needed,
  • Smashbox Crease Brush #10, which is really fluffy and airy and blends out the edges of the shape you’ve drawn perfectly,
  • Smashbox Double-Ended Smudger Brush #20 used to blend the eyeliner down into the lash line and ever so softly upwards onto the lower part of the lid so that there are no harsh edges.

Special thanks to videographer, Jason Brownrigg & to Sandbox Studios.

Comments Off on Natalia and the Smokey Eye | ...Here's how to

Back to top