Tag: MAC


Look Perfectly polished in nothin’ but the basics.

April 15th, 2014 — 6:02pm

MicheleAlvez_makeup_basics


Every season, fashion and beauty magazine editors and bloggers ask me “ What are the top 5-10 things every woman must have in her makeup bag?”

My answers vary slightly, depending on the age of their readership, but overall I’m known to favor keeping makeup rather simple and timeless.  To me it’s always been about enhancing ones’ features, which can be done with just a few simple products.

Please don’t mistake my short list of musts for a lack of support for those of you who want to experiment with wild eyeliner hues and bold, trendy lip color. I’m a big fan of that sort of thing, as well. But first I think it’s important to iron out the basics, and find what works best to enhance your favorite features, keeping your every day look as fresh-faced and minimally made up, as possible.  Once that’s established, playing with extras is a breeze.

In writing this post, I’m assuming you’ve gotten your skin care regimen down, and are starting with hydrated, nourished faces. This is not such an easy feat for so many of us, and if you’re having difficulty in this venue, the good news is, there are countless treatment options in the green beauty world for every skin type. It just takes some research and often a bit of trial and error.

So… what do I think no woman should live without (I really don’t feel that you couldn’t live without makeup – or things in general – but I think you know what I mean).

  1. A good eyelash curler. My favorite has been the one by Shu Umera because of the texture and shape of the pad, and overall shape and sturdiness of their handle and the part into which the pad fits.
  2. A creamy, neutral eyeliner. Depending on your hair and eye color, as well as your skin tone, and personal preference, this could be a pale taupe, a deep brown, a medium gray, or a deep, dark black.  Keep some cotton swabs on hand to smudge the line you draw, buffing it out ever so slightly.
  3. A mascara that gives the look you favor, whether that’s longer, thicker, darker, or all of the above. (I prefer all of the above)
  4. Tweezer. I can’t emphasize the benefit of a good tweezer enough. Shaping your brows and whisking away unwanted hairs from other regions of the face where they begin to show up – it’s  a necessity.  I’ve been a fan of  the Rubis for years, but it’s really all about finding one that feels right in your hand.
  5. Two cheek colors: one that makes you look warm and glowy, and one that mimics the color your cheeks turn when your heart rate has been pushed. I generally favor creamy cheek colors, but this is a personal preference thing.
  6. Two concealer shades: one with a bit more peachy/orange undertone to cut the purple inherent in under eye circles.  Then, one concealer that matches your skin tone and texture perfectly to cover spots as needed. I always like to finish a concealer/tinted moisturizer/ foundation application by pressing a slightly dampened beauty blender sponge into the skin to ensure that the texture of the product matches the texture of your skin. Don’t skip this step if can help it.
  7. 3 lip colors. Most women I know have many more than this, but honestly, if you have limited funds, a desire to keep your purse as light as possible, or become overwhelmed at the thought of keeping up with lip trends, three shades is perfect. I’d start with a sheer, tinted lip balm in a color that’s pretty similar to your lips, add a similar shade in a proper lipstick formulation that’s somewhere in the satin range – moist, not matte, yet not glossy, and finally, a color that you love, and that gets smiles from others when you wear it – could be a bright pink, an orangey red, or a deep berry.
  8. A sheer gloss. I lied – having a fourth lip product that feels good and has a bit of a moist look is always a good idea. This can be layered over any of the above, or worn alone when you’re feeling glossy.
  9. An eyebrow brush/pencil/powder/gel: When we’re young, our brows are usually at their fullest. You may want to brush them into a lovely shape in the morning and forget about them. As we age, however – even as early as in our early 30’s, our brows may start to look a bit less full, particularly towards the tails. Finding a brow pencil or powder that looks super natural is the way to go. Light strokes, mimicking the hair growth pattern is all you need, along with good lighting, to create a frame for your face. I’ve just recently found Eco Brows, a richly pigmented brow gel product in a pot, and really like it. I also love the fine point and ease of use of the brow pencils from MAC.

There you have it.

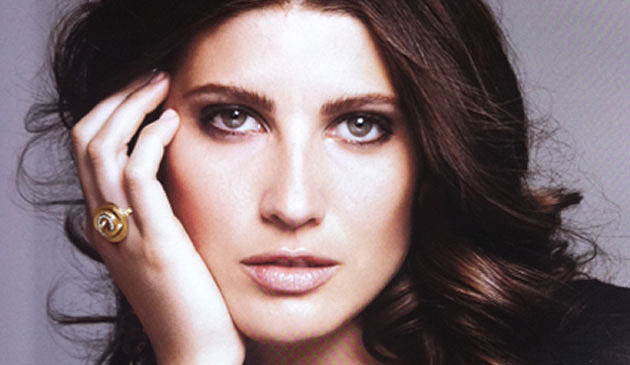
Here are some of my current favorite all natural products you can use to create this very pretty, basic look I did on my friend, the gorgeous model, Michele Alvez:

Comments Off on Look Perfectly polished in nothin’ but the basics. | ...Here's how to

show the world that less is more: super basic makeup 101.

December 24th, 2012 — 5:12am

miniblog

photo: Tim Bell

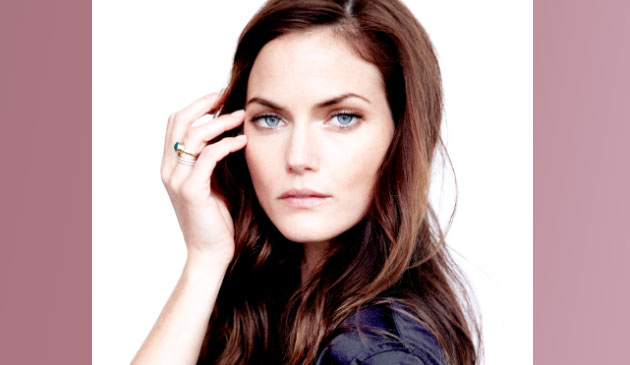
This is my beautiful friend, Mini Anden.  To have a conversation with her, you’d have no idea she was born and raised in Sweden because she doesn’t have a trace of an accent. We’ve known each other for a number of years now, and I absolutely adore her. She’s really intelligent, we have the same sense of humor   (I love it when she cracks us both up while I’m doing her makeup), and she’s a great listener and advice-giver. All of that mushy stuff aside, she’s an incredible model, and at just under 6 ft tall with a body that she subjects to intense workouts including a fusion of pilates and boxing known as piloxing (she has serious abs that I’ve actually tried punching just to see how strong they are – and they kinda hurt my hand!), she’ll have a career in front of the camera for as long as she wants.

She’s also a totally natural beauty. I really prefer how she looks mostly bare-faced, unless she’s been made up for an editorial photo shoot in a magazine with really intense makeup. Her eyes are incredibly blue, in that almost unreal, is-she-wearing-colored-contacts? way.  She’s also a perfect freckle-face, with tons of cute dots all over, although the size of this photo doesn’t let you see just how intense they are.

We shot the photo above after a long day on set, after she’d taken off most of the makeup I’d put on her for the day’s shoot. As you likely know from the makeup I do, I like to accentuate the beauty that already radiates from each woman, rather than drawing her a new face on top of the one that exists. In Mini’s case, I wanted to show how just a little eye makeup and slight skin perfecting makes for a polished look.

We did a very basic touch up before putting her in front of a window, against a white wall with no fancy lighting or makeup tricks used.

The products I used were:

Toning Mist, Kahina Giving Beauty: I had Mini close her eyes, and on her freshly washed face, I generously sprayed this mist to help replenish moisture and calm her skin.

Facial Lotion, Kahina Giving Beauty: I’d already given Mini a face massage with oil earlier in the day, so for this photograph I opted to use a less dew-inducing option, while still offering great hydration.

Shu Uemura Eyelash Curler:  I know many people are scared to curl lashes once they’ve been coated with mascara, but if you do it carefully, and just barely tap the curler when you’re holding it just at the root, you’ll be fine. NO TIGHT SQUEEZING here, please. You’ll take off the mascara where the metal touches your lashes and have a blank space that no amount of recoating will really help cover.

‘Cloud Nine’, Kjaer Weis Eye Shadow: This is one of those really flattering (for fair to medium complexions) champagne/ivory shades with a pearly finish that does a great job of illuminating the eye without leaving behind those horrible bits of glitter. Using this MAC brush I like to place the eyeshadow in the inner corners of the eye, in the very center of the lid, and trace a bit underneath the bottom lashes. I then use my clean finger tip to gently blend the shadow into the skin in the inner corner, and generally I’ll use this brush from Laura Mercier to buff the shadow into the lid.

Black Eyeliner, Vapour Organic Beauty:  Just a light smudge of an eyeliner swiped and pressed into the under side of the outer edge of the top lashes, and then wiggled in between the lashes, and maybe even just a teeny bit smudged on top of the outer edge of the upper lash can do a lot to emphasize the eye without making it look made up.  Depending on the shape and color of your eye, you might find your eye looks best with the entire inner rim lightly darkened, but for most almond shaped eyes, accentuating the outer upper lash line is just enough.  You can try this look with a brown, gray, taupe, or even purple or navy liner to see which you like best.  Different colors will accentuate your eye color ; for me a dark purple liner will not so much read as ‘she’s wearing purple!’, but will simply make the green of my hazel eyes pop.

Very Black, Lash Blast Mascara by Covergirl: I love dark black lashes, even if it’s just a light coating. As I’ve said countless times, this mascara is super black (whereas so many others are more of a light black, almost gray), and can be layered for a more intense look. If you read my blog because you’re looking for only ‘green’ beauty recommendations, I apologize – this isn’t one of them!

Concealer, Mineral Fusion: I like these concealer duos because similarly to the much acclaimed Laura Mercier secret camoflauge duos, you can blend different amounts of the two colors together to get the exact shade you need for the specific part of your face on which you’re laying the product. Under your eye, for example, you’ll want to use a high concentration of a peach/orange concealer to combat the purple – trust me, it totally works. I’ve used straight orange pigment to cover super dark circles under the eyes of women with very deep complexions with great success. Then you blend the more skin-colored shade over top and pat with your ring finger to create a seamless cover on the skin.

On most faces I concentrate on coverage under the inner 1/3 of the eye (never put concealer under the outer 1/3 of the eye unless you want to accentuate your fine lines and wrinkles!), underneath, and around the outer edges of the nostrils, and on any spots or redness/discoloration you may have, but only if you ensure you’ve blended both the color and texture into your skin so that you’re not just highlighting the spot.  For small blemishes, using a really tiny brush like this with a concealer that matches your skin exactly can be helpful.

Bone Beige, MAC sculpting powder: I often swirl this underneath and on to cheekbones as a sculpting powder and I like it, as well, as a non-shimmering bronzer. On Mini, I lightly underlined her cheekbones with Bone Beige using this contour brush.

Freja, Luminous Shimmer Blush, by Alima Pure: I’m usually against products with particles of glimmer, but in this case, they’re really very small, and the color and glimmer combine nicely to give a very-barely-there-pink to the apple of the cheek.

Honey Lip Balm, Burts Bees: Mini put this on herself, as per usual. Ever since I can remember, I’ve seen Mini with this little yellow tube in her pocket, purse, or hand. I can honestly say, it does her lips right, and I’ve never seen them chapped!


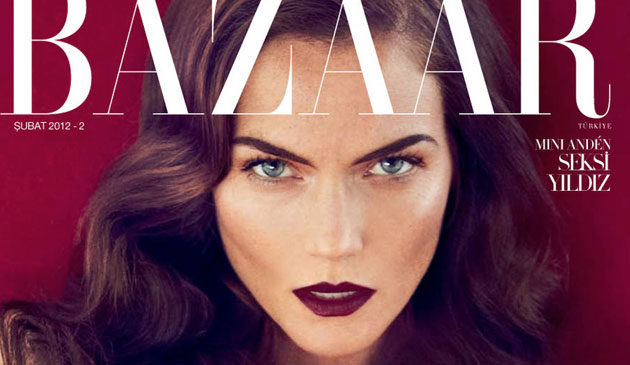
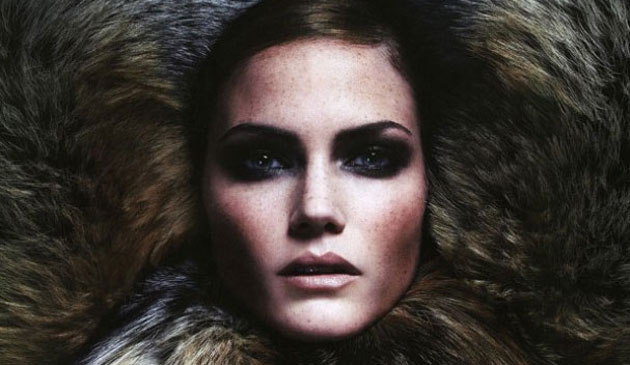
Just for fun, here are two shots of Mini that I love that really show how transformative a little makeup/hair/styling can be. Note her dark eyebrows in the first one. They look incredible for this photo, but would look shocking if you ran into her at the grocery store looking like that.

minibazaar

minifur

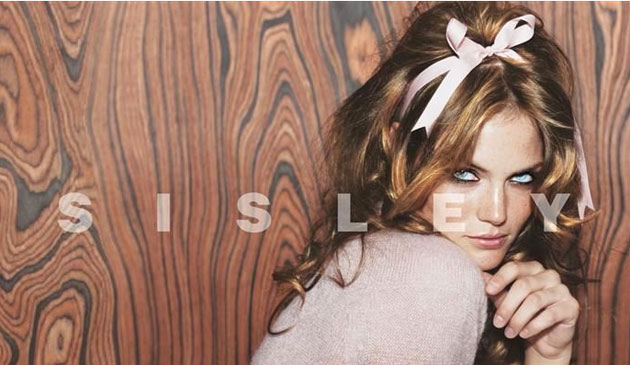
minisisley


One last endearing thing I’ll leave you with about Mini is that she and her husband, Taber, have a house full of dogs. Mini tweets pictures of them in various positions that make me laugh and laugh. I took an immediate liking to Gus, the skinniest, long-nosed munchkin in the center of the first photo; i think it’s because we resemble one another.

minipupsinsunshine minicincodemayopup minipupsoncouch minixmaspup

Thank you, Mini, my love!!!


Comments Off on show the world that less is more: super basic makeup 101. | ...Here's how to

More reasons to love the Fall… Rich berry colored lips!

October 13th, 2012 — 12:23am

Fall: It’s that sweet spot between end of the summer and the start of the holiday season. It’s time for you to break out those gorgeous fall lip colors and see how fun they are to wear. Choose from a barely there sheer wash of color, super pigmented mattes, and glossy payoffs.

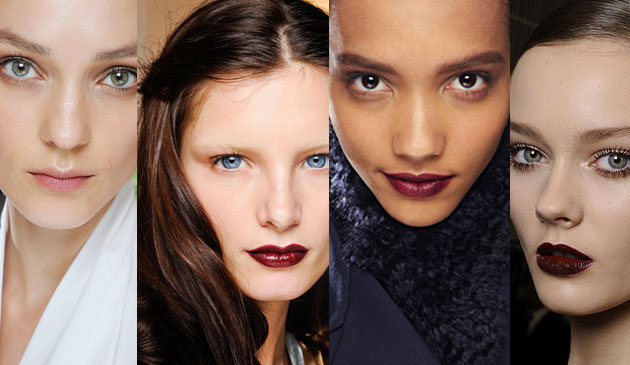
A good number of you have asked me for a lip color round-up to introduce you to some of the shades we see this time of year on the runways and red carpets:  deep, rich plums lipsticks, purple-y red glosses, satin-finished blackberries, and sheer merlot stains. It’s not always easy, though, to gauge just how this type of color is going to look on the lips.

The finished product not only depends on the way in which you apply:

1. directly from the tube, with a heavy hand, in a smeared, back-and-forth motion;

2. from the tube, but only lightly dabbing the stick onto your lips;

3. with a lip brush to make a precise edge;

4. by tapping your finger from the tube to your lip, adding layers of pigment until you reach the desired intensity level,

but it also depends heavily on what your natural lip color is before you start applying.  Those with a lot of pink or red in your lips are going to find that the deep purple wine stains can take on a completely different hue, and those of you with a really deep brown color to your lips may find that some of these shades disappear completely on you, or never show up with enough intensity, no matter what you do.

All of that said, it’s really difficult for someone like me (or a makeup company, for that matter) to definitively advise you on what to buy based on how you look sans lip color.  I can however, suggest shades to play with, and tell you my favorite ways to apply them. What should ultimately influence your decision when you’re standing at a makeup counter, or staring at lipstick swatches on the screen of your computer, wondering: when was the last time my  laptop’s color temperature was calibrated? [NEVER?!] are variables like: your eye color, your hair color,  your skin tone, your clothing color palette, your mood…

In no particular order (really, just the order in which I pulled them out of my big ol’ bag of lipsticks), here are some of my favorites. Those of you who follow this blog based on our shared love for ‘green’ beauty options, please take note that there are a handful of lip colors that don’t fall into that category, however, they’re such rich and dense shades – shades which are not readily available (or at least not that I know of!) in the all-natural world of lip color – that I often use them on photo shoots when I need that intensity. I did just check Jane Iredale’s webiste and found that she has a few deep purple shades that I have not yet tried.

HOW TO GET: NOT TOO HEAVY, NOT TOO LIGHT: THE PERFECT APPLICATION OF COLOR

When you’re new to wearing these shades, it can be overwhelming to see yourself with a thick application of. let’s say, Ilia’s ‘Ink Pot‘, or Mac’s ‘Rebel’ (which are very similar in color).  Instead, try tapping the lipstick onto your lightly lip-balmed lips, or use your ring finger to tap a good amount of product from the tube, and then press the pigment into your lips. This is how I generally apply all lipstick, even on myself. It helps to ensure less caking along the corners of your mouth as the hours pass, and through the act of pressing the product into your lips, you’ll find it sticks around longer than if you simply swipe the tube across your pout once or twice.

HOW TO GET: SHEER COLOR WITH A DEWEY FINISH

There are a multitude of great sheer options on the market that are easy to apply, and the more swipes across your lip, the deeper the shade becomes. My top favorites include: Burt’s Bees Lip Shimmer in’Prune’ and Kjaer Weiss’ ‘Sensuous Plum’.

HOW TO GET: SHEER GLOSSY LIPS

Trying out a lipstain, like ‘Quickstep or ‘Foxtrot’ [Foxtrot not pictured below]’ from Josie Maran is another great way to become acquainted with these shades. To start, color the marker onto UNMOISTURIZED lips (this is important to ensure the color will adhere), and then try following up with a gloss, like the gorgeous blackberry one from Vapour Organic Beauty in ‘Bitten‘, or their more chocolate shade ‘Risque‘. This makes for a luscious and easy to wear fall shade.

HOW TO GET: INTENSELY COLORED, MATTE OR SATIN FINISH LIPS

If you’re going for a much more dramatic look, make sure that your lips have been moisturized, but then blot them with a tissue, to ensure that your deep lipstick of choice adheres evenly, and depending on the look you’re going for, you might want to lightly outline your lips in a similar shade lipliner to ensure the color doesn’t bleed.  I wouldn’t advise that a dramatically deep, highly pigmented purple or merlot shade (like the one pictured on the model in the photo on the right) EVER be  highly glossy (i.e. adding gloss on top of the lipstick) in real life (a photo shoot is a different story). It’s guaranteed to slide off your lips, appear blotchy, and get on your teeth. This means that a super deep shade should be in a matte, satin, or have a super light dewey finish. It’s a great idea to lightly touch a tissue onto a closed mouth to ever so slightly remove excess product. My picks to accomplish this kind of look: NARS, ‘Train Bleu’ matte lip pencil, Chanel ‘Rouge Noir’ Lipstick, MAC Smoked ‘Purple Matte’ Lipstick, and Vapour Organic Beauty ‘Siren Bold’ Lipstick.

HOW TO AVOID:  THE DREADED LIPSTICK ON YOUR TEETH LOOK!

My grandmother showed me the best way to ensure that this embarrassing faux pas doesn’t happen:

1. after applying your lip color, open your lips into an ‘O’ shape.

2. grasp a cotton swab by the middle between your pointer finger and thumb, placing one end of the swab into your mouth, keeping your fingers on the handle, just outside of your mouth with the other cotton bud end pointing straight out, parallel to    the floor.

3. Pucker your lips like you’re  blowing a kiss around the handle of the swab, and gently pull the swab out of your mouth, making sure the inside of your lips comes in contact with the cotton as it leaves your mouth.

4. Repeat with the other side of the swab.

Voila – all of the excess color that would’ve ended up on your teeth has been swept away! Packing a few q-tips in your purse is always a good idea, to use for this trick, or to clean up fallen mascara.

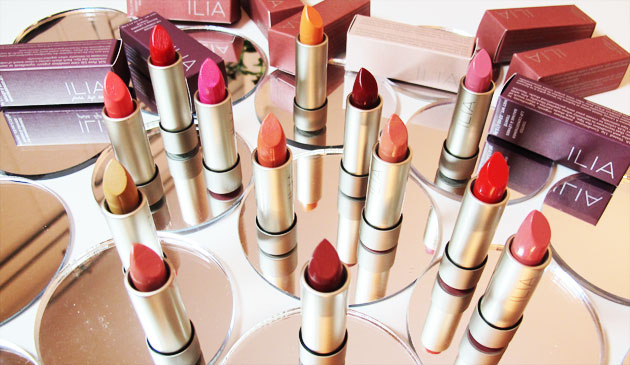
The final two shades on the bottom right of the photo below are soon to be released, are part of the ‘green’ family of beauty products, are super affordable, and super beautiful. Once they hit the market I promise to tell you who makes them!

Happy leaves-changing, sweater-wearing, chilly hands, feet, and noses, FALL WEATHER everyone!


Comments Off on More reasons to love the Fall… Rich berry colored lips! | ...Here's how to, ...I'll test it for you

Happy Green Beauty Month Everyone! Don’t already know about these lip colors from ILIA? you’re in for a real treat.

March 31st, 2012 — 2:35am


My first introduction to ILIA lipsticks happened last year while poking around ABC’s apothecary section (I think that ABC, in NYC, is one of the most well edited, well curated stores, both in content and aesthetic.) In addition to a ton of beautiful things for the home, they carry the best of the best when it comes to non-toxic hair/face/body products. When you’re in NYC you have to check it out. It’s beautiful, you’ll want to own everything, and you’ll be bummed that so much is so expensive. That said, these well designed, sleek little silvery tubed lipsticks caught my eye, and were reasonably priced compared to other high-end lipstick lines. When I gave one a try on the back of my hand, I was surprised to find how well pigmented the color was, and how smoothly it went on. The only down side was that there were only 6 or 7 different shades available.

I came home and wrote to the ‘info’ email address from the ILIA website and asked some questions. Almost immediately I got really thorough answers back from owner and creator, Sasha Plavsic (who hails from Canada, but now calls LA home). She explained to me that she’s learned  a cosmetic can still be completely non-toxic, even though it contains a very small percentage of synthetic color.  Synthetic doesn’t mean bad for us, just as all-natural isn’t always good for us.  Without allowing for that teeny percentage of synthetic pigment, she explained, there’s no way to achieve the rich intensity of the colors we love in favorite lipsticks from MAC, NARS, and Tom Ford, to name a few. So the base into which she mixes the color is all-natural, organic, super nourishing, healthy for the lips and perfectly healthy for the rest of you – which is important since we all eat and absorb our lipsticks into our bodies every day.

Sasha worked diligently to create a product that would meet the Environmental Working Group’s strict guidelines (if you aren’t familiar with the EWG, please check them out.) They are highly informative and influential as an online encyclopedia for ingredients found in cosmetics and rates their levels of toxicity. I will absolutely write about them in their own post this month, and found a way to offer all the intensity of bold colors like orange, pink, and red, that have been missing thus far from all-natural lines. Then Sasha put them in great-looking containers. I’m a sucker for packaging, and this woman knows what she’s doing, with her strong background in design and marketing within the branding world.

The best news ever is that ILIA just launched a new collection, complete with 14 lip colors – 6 are highly pigmented, and the other 8 are still well pigmented tinted lip conditioners.  I’ve been wearing ‘Nobody’s Baby’  and ‘In My Room’ the past few days, which look like my lips, but better. I also love the hot pink lipstick shade ‘Neon Angel’. In addition Sasha’s also come out with some cheek tints and highlighter creams in a tube that look wonderful. (highlighter creams are for cheekbones, eyelids, bridge of the nose, cupids bow, etc.)  I’ll give them a try over the next few weeks and report back.

Finally, I really love her no-color lip balm. It’s one of my new favorites for sure.

My only request: ILIA, can you work on coming out with a a bright orange-red for your next edition?  I’d proudly wear it every day.

*note about the photo above: this is how much of a beauty product nerd I am – I got the products from ILIA on Friday around 6 and I decided to call off my plans that night so I could stay home and play with them, and play with taking pictures of them for the blog. Don’t they photograph beautifully?  Thanks, ILIA!!!

ILIA is sold at a good number of locations across the country and around the world (GO ILIA, GO!), see here for specifics as well as online at www.spiritbeautylounge.com


Comments Off on Happy Green Beauty Month Everyone! Don’t already know about these lip colors from ILIA? you’re in for a real treat. | ...I'll test it for you

Christy Turlington sure did rock this red lip I gave her!

March 8th, 2012 — 1:30pm


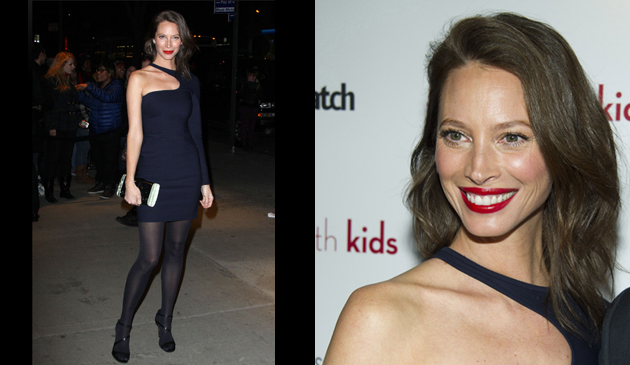
Earlier this week I went over to Christy’s place to do her makeup for the premier of the all-star cast film called ‘Friends With Kids’, featuring her husband, Ed Burns. The last few times I’ve done her makeup we’ve gone with bronze skin and nude lips. Not this time.

Christy’s involvement with all things supporting the advancement of the status of women around the world – particularly through her organization Every Mother Counts (EMC) – is really inspiring to me. We discussed her upcoming trip to India with EMC, the seriously amazing list of singers who’ll be lending their voices to EMC’s newest benefit CD, and when we were deciding which outfit she would be wearing to the premier (I love this navy dress by Stella McCartney that she chose), we started discussing my blog, and tweeting, and Christy (a twitter expert) asked if I’d heard of ‘Rock the Lips‘, a group of women who came together to help empower women all over the world to help each other through the offering of micro loans. I was excited to hear about their mission as well as their suggestion that on International Women’s Day (which is March 8th), all women ‘rock a red lip’ in solidarity. We decided to honor IWD – and this exciting program – a few days early.

I didn’t have my entire lipstick kit with me (you wouldn’t believe how heavy a bag of 50 or 60 lipsticks can be!), but I knew I had a number of my favorite reds. After Christy settled on the dress, I knew the lip that would look the best would have a crisp edge, be as intensely pigmented as possible, and have a slight emollience to it. A well-hydrated, lightly exfoliated lip is of utmost importance when it’s going to be painted a pretty red. I was not the least bit surprised to find Christy’s in perfect condition.  Applying the color in layers and with different textured products, really keeps the lip looking good longer (my grandmother taught me this). The order of the products I used is just as important as the products themselves.

Here we go:


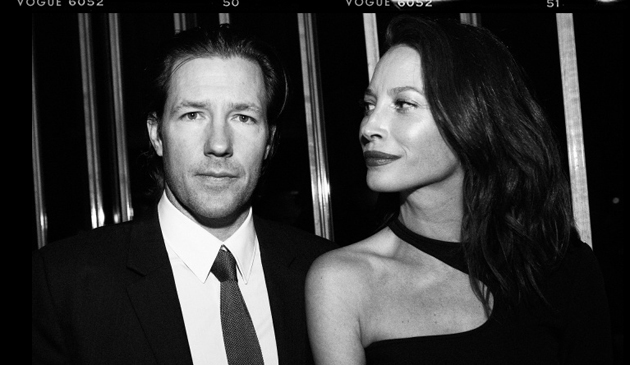
Here’s a pic that Vogue.com ran from the after-party. (Ed is much cuter in person than in this picture. Christy, however, looks incredible.)

Comments Off on Christy Turlington sure did rock this red lip I gave her! | ...Here's how to

Natalia and the Smokey Eye

February 20th, 2012 — 6:00am

I’ve loved Brazilian model Natalia Costa since I first met her almost 5 years ago on what’s called a ‘test shoot’. For those unfamiliar: a test shoot is when a hair / makeup / photographer / model get together with the hope that they can create images that they’ll be proud to put in their portfolios.

Generally this is not the case, because often one or more of the parties are usually still really new to their craft and when one element is off, whether it’s hair, makeup, modeling, photography – it makes for ‘it’s almost good, but not quite’ pictures. This wasn’t the case with my test shoot with Natalia, despite all of us variables being really new to the industry.

I even credit those pictures of her as being part of the reason my agency signed me. I don’t ‘think it’s possible for a bad photograph to be taken of this woman. I chose her to make this, my first how-to video for my blog, both because I love the way she looks – particularly because she has the perfect large, almond shaped eyes for a makeup instructional film- and because I love her for who she is. I also think it’s super adorable that towards the end of the video, her alluring accent has her saying that she was “cheesed” instead of “teased” about her eyes.

There are countless ways to accomplish a smokey eye. I’m sure I’ll post a number of other techniques in the future, so that you can pick the one that works the best for your eye shape and your ability to work with shadows/liners/brushes/your fingers. A smokey eye can come in any color, density, and a multitude of shapes.

This one was created with:

  • Eyelash curler: Shu uemura
  • Shadows: Chanel quad, Mac Carbon (a medium black that’s easily blendable for that smokey look)
  • Mascara: Covergirl lash blast, the orange tube, in very black
  • Eyeliner: Georgio Armani, black (the formula is creamy and blendable, which is important for this look)

And I used these brushes:

  • MAC #239 Eye shader brush to build up the base light color all over the lid.
  • MAC #219 to draw the shape with the dark shadow.
  • Smashbox  Definer Brush# 15, which is a little fluffier and more dense than the MAC 219 brush, which will help diffuse the edges of the shape you’ve drawn with the dark color, and to pack on more dark color where needed,
  • Smashbox Crease Brush #10, which is really fluffy and airy and blends out the edges of the shape you’ve drawn perfectly,
  • Smashbox Double-Ended Smudger Brush #20 used to blend the eyeliner down into the lash line and ever so softly upwards onto the lower part of the lid so that there are no harsh edges.

Special thanks to videographer, Jason Brownrigg & to Sandbox Studios.

Comments Off on Natalia and the Smokey Eye | ...Here's how to

Back to top