Tag: Kahina


Serum vs Oil: What’s the difference?

November 18th, 2013 — 2:53am

serum_vs_oil_blog

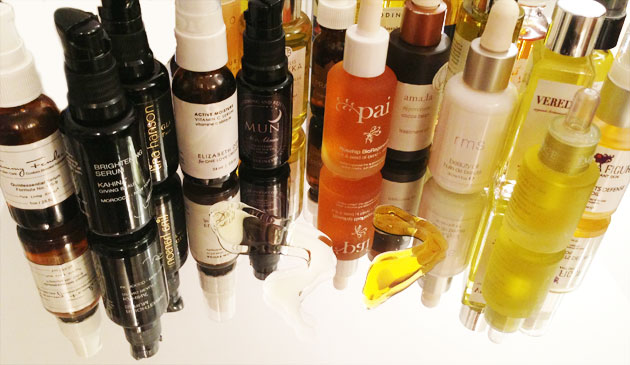
Are you confused by what makes a facial serum different from a facial oil? Are you overwhelmed by the ever-growing number of both kinds of products on the market, particularly the green beauty market?  Don’t know where to begin your research to find the perfect oil and/or serum for you? You’re definitely not alone. This photo shows just some of my favorites from my ever growing collection, and is an indication of just how many delicious – and different – options are available (and potentially overwhelming!)

I love a good glow, the kind that only comes from super hydrated skin. I start 90% of my makeup applications on skin that I’ve prepped with a facial oil or serum, including my own skin. But what defines one product an oil, and another a serum?  The woman behind the eponymous skincare line, May Lindstrom, explained it wonderfully well:

  • A face oil adds hydration and nutrition.
  • A serum does something bonus – it brightens, slows the onset of lines and wrinkles, it tightens, it exfoliates, etc.
  • Serums can be essentially a face oil blend with an extra ingredient(s), or it can be an oil-free base of aloe or an emulsion of oils and floral waters, or any number of other things. Serums vary wildly in texture and use. Some replace your face oil (because it’s basically one), and others are sticky and do not wear well alone at all and must be layered with a face oil or cream.

So where should you start when you make the decision to incorporate an oil and/or serum into your routine?

  • There’s a great resource/reference site called rank and style that uses algorithms to search the internet to determine which products are selling the most and getting the best blogger, editor, and industry  recommendations, and then synthesizes all the info they collect to put out top 10 lists on just about everything, from specific items like puffer jackets or yoga mats, to all-natural face oils or brown ankle boots. I must admit I was skeptical at first, but I knew that since I’m familiar with all of the natural serums on the market, this would be a great list to test how spot-on their data collection really is.

    I was super happy when their list, which you can check out here, included all great, all truly green options, all of which I can give my stamp of approval.  I didn’t include them in my pic above because I’d used up my stock of them, but in addition to those you see, I’m also huge fan of the serums from Tata Harper and Burt’s Bees, which came in at numbers 3 and 5, respectively (very different price points, but both really great).

  • You may know me to mention this site: Spirit Beauty Lounge from time to time (that means all the time). I’ve gotten to know Spirit over the years and hands down, she’s the most knowledgable person I know when it comes to all things green beauty.  Check out her thoughts and recommendations on oils and serums here  and here. She’ll send you samples so you can see which your nose (the aromatherapy aspect is key for me) and your skin respond to the best before you commit to full containers – but I can assure you, there’s not one on her site that I don’t like.

    A funny side note: A while back Spirit and I were at lunch and she asked which serum I was using. I told her I was fearful of serums because of my constant outbreaks, and that I’d basically stopped using everything on my skin. The look of disappointment that spread across her face told me that my understanding of serums was off, and she promptly schooled me. I’ve been using serums ever since and have seen a HUGE improvement in texture, lines, and coloration of my skin, and even a decrease in outbreaks. Who knew?

  • Finally, this cheat sheet article on Birchbox.com, in which Los Angeles aesthetician, Rita Csizmadia is interviewed, really helps break down why you should be using an oil/serum, and specifically which types of oil are best for your skin.

WHAT ABOUT THOSE OF US WITH SUPER SENSITIVE SKIN?
SHOULDN’T WE STAY AWAY FROM THESE PRODUCTS?

We’ve all been made to fear oils and oil-based serums – especially those of us who break out easily – because of oil-free product-marketing that has been heavy in the media for decades now. I can attest, however, that for *most* people, incorporating a serum or an oil into your weekly (if not daily) routine is beneficial. The only times I’ve seen problems is when A. I applied oils to models who don’t frequently exfoliate, therefore the oil or serum wasn’t able to penetrate into the skin, onto which I then piled foundation, concealer, and powder for a day – or week! – of photographing,  or B. when I used a very active serum – one that is chock full of high doses of plant extracts – on highly sensitive skin (like my own), and the skin just straight away had an allergic reaction to it, and got all red and bumpy.

If you have eczema or rosacea you may benefit greatly from a gentle face oil or serum, and you may want to top it off with a moisturizer to help strengthen and protect the external layer, as well. If you’re acne-prone, do not fear – the most wonderful thing about oils and serums is that they penetrate quickly, which means they don’t have waxes and other heavy components to sit on top of the skin and clog pores.

Finally, know that if one oil or serum breaks you out in pimples or a rash, that doesn’t mean they all will. Keep trying until you find one that doesn’t, and remember that you don’t necessarily need to use it daily. Sometimes a bi-weekly application is more than enough to keep those deeper layers of skin hydrated and plump.

There are numerous variations in ingredient lists, and it’s a good idea to familiarize yourself with which oils and extracts are right for your skin. The above links will help you do just that.

HOW TO USE A FACE OIL/FACE SERUM

  1. On freshly washed skin that is still damp from washing, OR on freshly washed skin that has been spritzed with a hydrating spray, apply a few drops of your product with your freshly washed fingers.
  2. Gently glide the product across your forehead, cheeks, chin, and give yourself a gentle massage, gently pressing it into your skin, making sure to bring it down onto your neck, and the area of skin below your collarbone, even down to your chest. You’ll notice that a little product goes a long way when you apply it to damp skin.
  3. Allow the product to sink in for a few minutes before applying your moisturizer (if you determine you still need one) and your makeup, and if you’re a nighttime applier, be sure to complete your regimen long before your face hits your pillow to allow maximum absorption time.

Let us know what you’re using that you love, and how you would describe your skin before and after you discovered oils and serums, here, on the Facebook page for this blog.

Do I need to include a disclaimer line here? Just in case, here goes:  You all know I’m not a dermatologist, nor a scientist. I’m just a person who looks at, touches, and learns about different skin on a daily basis. I also ask a ton of questions and do a ton of research. Finding an aesthetician, dermatologist, or holistic health care practitioner you feel you can trust is wonderful, but I believe we each have the responsibility and the ability to do some of the research about what’s going to benefit us by ourselves, for ourselves.

xoxo


Comments Off on Serum vs Oil: What’s the difference? | ...I'll test it for you

show the world that less is more: super basic makeup 101.

December 24th, 2012 — 5:12am

miniblog

photo: Tim Bell

This is my beautiful friend, Mini Anden.  To have a conversation with her, you’d have no idea she was born and raised in Sweden because she doesn’t have a trace of an accent. We’ve known each other for a number of years now, and I absolutely adore her. She’s really intelligent, we have the same sense of humor   (I love it when she cracks us both up while I’m doing her makeup), and she’s a great listener and advice-giver. All of that mushy stuff aside, she’s an incredible model, and at just under 6 ft tall with a body that she subjects to intense workouts including a fusion of pilates and boxing known as piloxing (she has serious abs that I’ve actually tried punching just to see how strong they are – and they kinda hurt my hand!), she’ll have a career in front of the camera for as long as she wants.

She’s also a totally natural beauty. I really prefer how she looks mostly bare-faced, unless she’s been made up for an editorial photo shoot in a magazine with really intense makeup. Her eyes are incredibly blue, in that almost unreal, is-she-wearing-colored-contacts? way.  She’s also a perfect freckle-face, with tons of cute dots all over, although the size of this photo doesn’t let you see just how intense they are.

We shot the photo above after a long day on set, after she’d taken off most of the makeup I’d put on her for the day’s shoot. As you likely know from the makeup I do, I like to accentuate the beauty that already radiates from each woman, rather than drawing her a new face on top of the one that exists. In Mini’s case, I wanted to show how just a little eye makeup and slight skin perfecting makes for a polished look.

We did a very basic touch up before putting her in front of a window, against a white wall with no fancy lighting or makeup tricks used.

The products I used were:

Toning Mist, Kahina Giving Beauty: I had Mini close her eyes, and on her freshly washed face, I generously sprayed this mist to help replenish moisture and calm her skin.

Facial Lotion, Kahina Giving Beauty: I’d already given Mini a face massage with oil earlier in the day, so for this photograph I opted to use a less dew-inducing option, while still offering great hydration.

Shu Uemura Eyelash Curler:  I know many people are scared to curl lashes once they’ve been coated with mascara, but if you do it carefully, and just barely tap the curler when you’re holding it just at the root, you’ll be fine. NO TIGHT SQUEEZING here, please. You’ll take off the mascara where the metal touches your lashes and have a blank space that no amount of recoating will really help cover.

‘Cloud Nine’, Kjaer Weis Eye Shadow: This is one of those really flattering (for fair to medium complexions) champagne/ivory shades with a pearly finish that does a great job of illuminating the eye without leaving behind those horrible bits of glitter. Using this MAC brush I like to place the eyeshadow in the inner corners of the eye, in the very center of the lid, and trace a bit underneath the bottom lashes. I then use my clean finger tip to gently blend the shadow into the skin in the inner corner, and generally I’ll use this brush from Laura Mercier to buff the shadow into the lid.

Black Eyeliner, Vapour Organic Beauty:  Just a light smudge of an eyeliner swiped and pressed into the under side of the outer edge of the top lashes, and then wiggled in between the lashes, and maybe even just a teeny bit smudged on top of the outer edge of the upper lash can do a lot to emphasize the eye without making it look made up.  Depending on the shape and color of your eye, you might find your eye looks best with the entire inner rim lightly darkened, but for most almond shaped eyes, accentuating the outer upper lash line is just enough.  You can try this look with a brown, gray, taupe, or even purple or navy liner to see which you like best.  Different colors will accentuate your eye color ; for me a dark purple liner will not so much read as ‘she’s wearing purple!’, but will simply make the green of my hazel eyes pop.

Very Black, Lash Blast Mascara by Covergirl: I love dark black lashes, even if it’s just a light coating. As I’ve said countless times, this mascara is super black (whereas so many others are more of a light black, almost gray), and can be layered for a more intense look. If you read my blog because you’re looking for only ‘green’ beauty recommendations, I apologize – this isn’t one of them!

Concealer, Mineral Fusion: I like these concealer duos because similarly to the much acclaimed Laura Mercier secret camoflauge duos, you can blend different amounts of the two colors together to get the exact shade you need for the specific part of your face on which you’re laying the product. Under your eye, for example, you’ll want to use a high concentration of a peach/orange concealer to combat the purple – trust me, it totally works. I’ve used straight orange pigment to cover super dark circles under the eyes of women with very deep complexions with great success. Then you blend the more skin-colored shade over top and pat with your ring finger to create a seamless cover on the skin.

On most faces I concentrate on coverage under the inner 1/3 of the eye (never put concealer under the outer 1/3 of the eye unless you want to accentuate your fine lines and wrinkles!), underneath, and around the outer edges of the nostrils, and on any spots or redness/discoloration you may have, but only if you ensure you’ve blended both the color and texture into your skin so that you’re not just highlighting the spot.  For small blemishes, using a really tiny brush like this with a concealer that matches your skin exactly can be helpful.

Bone Beige, MAC sculpting powder: I often swirl this underneath and on to cheekbones as a sculpting powder and I like it, as well, as a non-shimmering bronzer. On Mini, I lightly underlined her cheekbones with Bone Beige using this contour brush.

Freja, Luminous Shimmer Blush, by Alima Pure: I’m usually against products with particles of glimmer, but in this case, they’re really very small, and the color and glimmer combine nicely to give a very-barely-there-pink to the apple of the cheek.

Honey Lip Balm, Burts Bees: Mini put this on herself, as per usual. Ever since I can remember, I’ve seen Mini with this little yellow tube in her pocket, purse, or hand. I can honestly say, it does her lips right, and I’ve never seen them chapped!


Just for fun, here are two shots of Mini that I love that really show how transformative a little makeup/hair/styling can be. Note her dark eyebrows in the first one. They look incredible for this photo, but would look shocking if you ran into her at the grocery store looking like that.

minibazaar

minifur

minisisley


One last endearing thing I’ll leave you with about Mini is that she and her husband, Taber, have a house full of dogs. Mini tweets pictures of them in various positions that make me laugh and laugh. I took an immediate liking to Gus, the skinniest, long-nosed munchkin in the center of the first photo; i think it’s because we resemble one another.

minipupsinsunshine minicincodemayopup minipupsoncouch minixmaspup

Thank you, Mini, my love!!!


Comments Off on show the world that less is more: super basic makeup 101. | ...Here's how to

VOGUE.com features my guide to going green for Spring!

April 19th, 2012 — 11:08am

I couldn’t be more excited to share this article from Vogue.com:  Makeup Artist Katey Denno’s Guide to Going Green for Spring

I really believe in the brands I recommend in the article, and have actually had the pleasure of getting to know some of the people behind the different product lines, as I always want to know the story-behind-the-story of how they got their start, and what keeps them going.

A HUGE thank you goes to the beautiful and brilliant Catherine Piercy, Beauty Editor at Vogue.

Thanks to photographer Jason Brownrigg for snapping these shots while I was working last week, and to the lovely model McKenzie Raley for sharing the photo with me.


Comments Off on VOGUE.com features my guide to going green for Spring! | ...I love this

Back to top