Tag: dr. hauschka


Pretty makeup, that’s what they want.

June 16th, 2016 — 12:50am

christina3  christina1

‘I want my makeup to feel light, look glowy and sheer, and basically, just make me look like the best version of myself’.

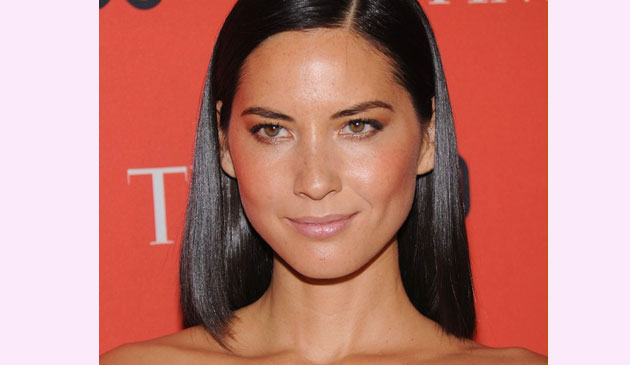
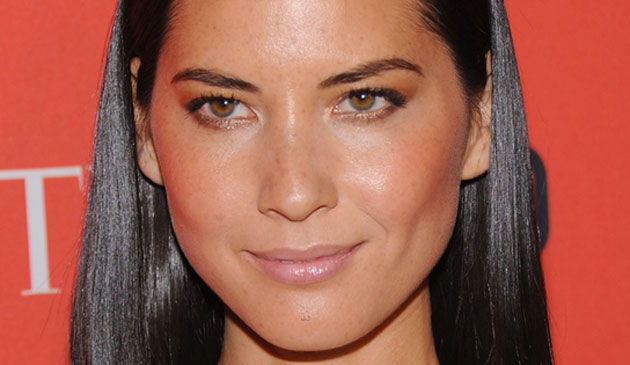
Unless I’m doing makeup for an editorial, 90% of the time this is what I hear from the person I’m about to make up.  It’s come to be my favorite kind of makeup look to create, in large part because I love watching my clients reaction when I’m finished. Who doesn’t like to make people feel good about themselves? It may be a superficial ‘feel good’ at first, but it seeps in. I watch moods change, frown lines soften, and interactions with others become lighter and more at ease.  Makeup really is transformative, and it doesn’t need to be heavy anywhere on your face, contrary to the heavy eye and brow makeup and pancake face with highlights and lowlights and contour and strobe trend that just won’t seem to go away.

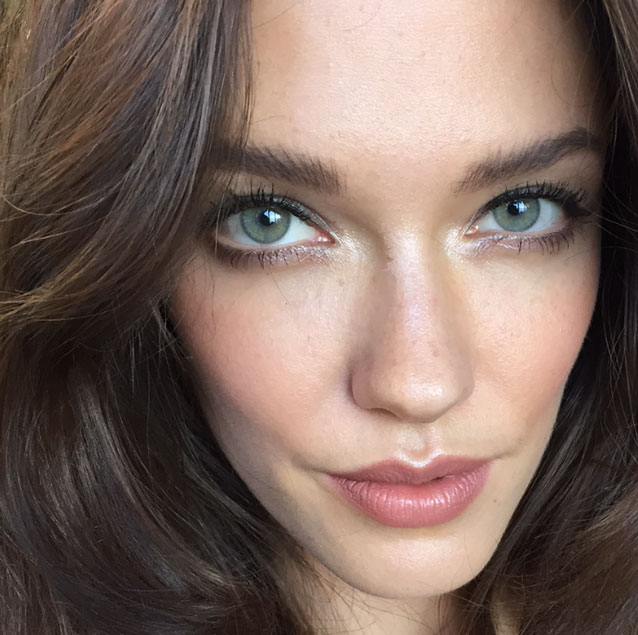
This is what I used for this light and glowing makeup on the beautiful Anna-Christina Schwartz:

Skin:

May Lindstrom Jasmine Garden Facial Mist– the scent is incredible and I use it as much for the aromatherapy for myself, as I do for my clients.

Biossance ‘The Revitalizer’ – a super light squalene moisturizer that’s good for all skin types.

Kjaer Weis Foundation – I use a fluffy eyeshadow brush to gently buff the cream into skin – the smallest amount around her nose, on her forehead, and around her eyes, patting it in with a damp beauty blender.

RMS Living Luminizer – not a surprise, I love to use this coconut oil based highlighter on the cheekbones, along the bridge of the nose, and the cupids bow.
Eyes:

I lined her eyes gently with cream shadow sticks from Ilia Beauty, in a gold/brown called ‘Age of Consent’, and a bit more heavily with ‘You Spin Me Round’ – a dark gray/black shade. I blended them in with a cotton swab so they melted into the lash line – both top and bottom.

Ilia Polka Dots and Moonbeams luminizer – I press this more dense, less emollient (than the living luminizer from RMS) highlighter into the inner corner of eyes to draw attention and make eyes dazzle even more.

I always curl the lashes at least once, focusing on getting that outer corner UP! It really makes eyes stand out. Two or three coats of a very black mascara on top, and one slight coat on the bottom lashes finishes the look.

Brows: Eco Brow in ‘Sharon’ lightly filled in her brows, and I used a cotton swab to ensure no hard edges. I brushed her brows up and held them in place with a little liquid (non-aresol) hairspray from Rahua on a spoolie brush.

Cheeks:

I usually use cream products that I swirl on the apples of the cheeks, but for this look I experimented by mixing a powder blush with a powder bronzer. For this I used ‘Blushing Rose’ and ‘Soft Terracotta’ from Dr. Hauschka and a medium sized fluffy brush.

Lips:

Gressa Skin ‘Bare’ Lip Boost over a bit of balm from R.L Linden. 

Comments Off on Pretty makeup, that’s what they want. | ...Here's how to

get Olivia Munn’s glowing skin and smokey bronzed eye

July 13th, 2013 — 9:04pm

Olivia_munn_blog_opt1

This image was taken the first time I worked with Olivia a few months ago. I’d always admired how great her makeup looks on the red carpet, and always thought she was one of the most beautiful actresses around. Olivia definitely knows how she looks her best – from the shape of the eyeshadow, to the angle of the eyeliner, and the placement of contour and cheek color. She shared with me that she’s worked with a fantastic makeup artist in Los Angeles for many years, and from the pictures she’s shown me from the events where she’s done her own makeup, it’s obvious that she, herself, seriously knows how to paint her own face – and put on false eyelashes better than anyone else I’ve ever known!

Before I tell you how to recreate this makeup look for yourself, I want to share with you this story:

Recently I arrived at Olivia’s hotel room to do her makeup for a TV show appearance. Before taking a seat in front of me, she reached into her purse and pulled out small bag containing a bottle of nail polish and a bottle of polish remover she’d just picked up at Whole Foods.  I was so excited (as only a green makeup artist can be) by what I saw.  Of all the options she had between the equally as close in proximity drug store, mainstream grocery store, and beauty supply shop, she made it a point to spend her dollars on nail products that are made by companies that have made a concerted effort to be as toxin-free as possible. The color was a killer shade of red, and the remover worked extremely well to remove the polish she started out wearing.  It’s the little purchases like this that say a lot. Companies that attempt to do better for the environment and for their consumers need our support.

Just one more reason why I’m so stoked to work with Olivia. Plus she personally makes the rounds to say thank you, and shakes the hand of every single person that had even the smallest roll on whatever photo or video shoot she’s working on. Who does that?! Olivia does, and it makes everyone feel *so* good.

Okay, back to telling you how you can make your own face glowy and bronzed:

FACE:

  • I favored a really dewy complexion for this glowy look. I started with a tiny bit of La Bella Figura’s Rainforest Hydration Treatment and thoroughly massaged it into her face and neck. A little goes a long way to intensely hydrating skin. I waited about 20 minutes until it had fully absorbed to begin perfecting her skin, which works out well since I always start with eye makeup first.
  • Once I finished her eyes, I used Vapour Organic Beauty’s Atmosphere Luminous Foundation Stick, applied with a small foundation brush, and worked it into the areas in need, patting it into place with a damp – but not at all wet to the touch – beauty blender sponge.
  • I started building the bronzed glow by first laying down a layer of cream highlighter from RMS beauty (living luminizer) on the areas of her face that I wanted to reflect the most light in front of the paparazzi: the bridge of her nose, her cheekbones and her cupids bow.
  • It wasn’t until I was nearly finished with the rest of her makeup, that I went back and mixed two colorful shades of Vapour cream cheek stick color in Torch and Courtesean  on my small, fluffy brush, and swirled them around the apples of her cheeks, just to give a brightness to her face.
  • Then I went to work with my favorite Dr. Hauschka powder bronzer, placing it onto her skin with a large, fluffy, super soft powder brush. The trick when powdering on top of cream is to make sure the cream has set as much as it can, and then place the powder color on top with a large brush. If you buff it too much you run the risk of smearing the cream below and creating streaks.
  • To finish her cheeks, I went back with a matte brown bronzer called Mauna Lao, from Alima Pure to add more definition to her cheekbones, and I softly placed the powder underneath them with a small eyeshadow blender brush, to really make them pop.

ON HER EYES:

  • I love Kjaer Weis’ eyeshadows and use them all the time. Here I placed ‘Charmed’ under her eye, and then over her entire lid, blending it upwards for a sheer application from crease to brow. Then I used my same Dr. Hauschka’s matte bronzer with a fluffy eyeshadow blending brush to create a little depth in her crease, particularly towards the outer edge.
  • It’s no secret that I love some serious lashes, so I curled the heck out of hers, and then applied 400 coats of covergirl lash blast, in very black (and a few individual fake lashes from Ardell for a little extra depth)
  • I filled in her brows with a deep brown brow pencil

ON HER LIPS

Et voila.

Thanks to Glamour magazine for calling Oliva’s look out in July’s issue as a beautiful way to bronze!

Just look at that face! Gorgeous!

olivia_munn_close_up_blog

Comments Off on get Olivia Munn’s glowing skin and smokey bronzed eye | ...Here's how to

show off your love for spring with a pretty pink pop

March 8th, 2013 — 5:38pm

angelahighsmithforblog

It’s always a real learning experience for me when model Angela Highsmith sits in my makeup chair.  Early on we discovered our shared passion for all things natural, and my respect for her body of knowledge grows every time we spend a day on set together.

At some point she told me that she brews up a tea for her daughter (this youthful beauty is a mom to a 10 year old) from an herb called Skullcap to ‘help chill her out before school’, and then went on to tell me about her herb garden and all the concoctions she makes to treat cuts and bruises from what she has growing in her own back yard. I recently introduced skullcap tea into my repertoire of ways to chill myself out and get ready for bed… and it actually does the trick!

Her knowledge of making her own medicines doesn’t stop there: she treats a variety of sensitive skin issues with oils, salves, and cold creams made with her own two hands, and a wealth of information she received during the many classes she’s taken at the New York Open Center, and in one-on-one sessions with herbologists.

When I asked her how she became interested in herbs, and the world of natural beauty products, she told me that she’d been interested in natural healing ever since she was a little girl, and that she used to make believe she was a Native American living off the land, with only what she found in her yard to eat, and to survive. As she’s gotten older, she explained, the natural products she uses become more and more natural: from using store-bought products with naturally derived ingredients, to focusing on searching out organic and edible products for skin and hair, to now making a good number of what she and her family uses, all by herself.  Very crafty and smart of you, Angela! Can I come over one day and see your garden?

On the day of this photo shoot I created a naturally glowing look with the following products – and even the most discerning green beauty aficionado would approve:

1.     Amala cocoa bean face oil massaged into Angela’s sensitive skin

2.     Vapour Organic Beauty liquid foundation used sparingly, starting from the center of the face, and blending outward

3.     Mineral Fusion concealer under her eyes very sparingly

4.     RMS cream eyeshadow in ‘Seduce’ on just her lids, applied with my fingers

5.     Onto curled lashes I applied a few coats of Honey Bee Gardens mascara in black

6.     Dr Hauschka bronzing powder swirled along her temples and across her cheekbones

7.     Burt’s Bees lip shimmer in Watermelon topped with a light coat of Burt’s Bees lipgloss in Spring Splendor

We both loved this fresh, gorgeous look (with just a pop of lip color) so much, that I thought to take a photo of her at the end of the day after she’d changed back into her street clothes. Can you believe this shot was captured at the end of an 8-hour day on set? Just beautiful, Angela, just beautiful!


Comments Off on show off your love for spring with a pretty pink pop | ...Here's how to

wear a bold holiday lip like Eugenia

November 24th, 2012 — 12:23am

photos: Tim Bell

I count this multi-lingual, timeless beauty, model, attorney, farm and restaurant owner,  daily blogger, and columnist for HELLO! magazine  (how does she find the time??!) – Eugenia Silva – among my favorite faces to paint on, and wonderful friends. We’ve shared a lot over the years we’ve known each other, including a love for the best products. Luckily for me, she’s as excited by the green beauty industry as I am.

When she asked if I wanted to do a blog post together, I jumped at the chance. With plenty to pick from, Eugenia and I dug through my huge bag of non-toxic lip colors. Our oooh’s and ahhh’s were particularly loud when we came across each of these three colors pictured here. It helps that with her coloring, she can wear most shades.  Side note: she did her hair changes in two seconds between shots. This chica is a serious model! After the long day of shooting advertising, Eugenia still looked wonderful, so we grabbed the fantastic photographer, Tim Bell, and within 30 minutes, our photoshoot was complete (and stunning!).

Look #1:  Ilia Beauty in Ink Pot – has a silky, satin finish with just enough emollience.

Look #2: Bite Beauty in Apricot -doesn’t look like any apricot I’ve ever seen! it’s a richly pigmented orange-y red – not shiny nor matte, but the perfect blend of creamy.

Look #3: Dr. Hauschka in #13 – a very lustrous richly pigmented PINK with a modest amount of reflective particles to really make your lips shine without being glossy.

With colors so intensely pigmented, bright, and moist, application technique is important, particularly if you don’t want to have constant touch-up worries. There are lots of techniques that will help your lip color to stay strong all night, but one of my favorites (and it doesn’t necessitate finding the perfect lip liner to coordinate) is as follows:

1. Begin with moisturized lips. Now blot them with a tissue to remove any wax or oil sitting on your lip skin.

2. Using a lip brush, begin building up product by swiping both sides of the brush against the lipstick.

3. Begin by tracing the outer edge of the bottom lip with your lip brush, depositing color densely and evenly.

4. Trace the cupid’s bow (center of top lip, directly underneath the nose) with the lip brush. Stand back from the mirror and see if your top lip would benefit from being traced just slightly above the actual lip line. If you’ve never done this before, give it a try and see if you like how it looks (many of us start to lose a little fullness in our top lip in our late 20’s), and wipe it off immediately if it makes you look clownish. Finish tracing the edge of the top lip, whether inside your natural line, or just outside. Stand back from the mirror again and make sure what you’ve drawn is symmetrical, and if it’s not, try and get it as close as possible.

5. Reload your lip brush with lipstick and begin pressing the color  – not dragging it – evenly into your lip. Press your lips together – don’t rub them, though. The goal is to press the pigment into your skin, which will stain it = making the color last longer.

6. Repeat step 5

7.  Place a single sheet of tissue between the lips and press them together to blot – again, do not rub, only press.

8.  Using a translucent loose powder, gently tap some into your palm or onto a tissue, and using your ring finger, press a very light coat onto your lips. Press your lips together one more time to bind the powder to the lipstick.

9. Finish with one more application of your lipstick. This can be done with your lip brush, with your finger – by touching the lipstick with your ring finger, and pressing it into your lips – or by tapping directly from the tube onto your lips. The point of this final step is to ensure that the intensity of color is there, and that the finish is emollient and even.

I know it sounds like a lot of steps, but I’m telling you, when you don’t want to think about retouching for hours, this is the way to go. Regardless – don’t forget to pack your lippie in your handbag. You never know what activity you might find yourself in that will smear your perfect pout. Wink wink!

Gracias, Eugenia!!!


Comments Off on wear a bold holiday lip like Eugenia | ...Here's how to

join me for my next class at Whole Foods in NYC: Clean & Green Makeup and Skincare!

May 6th, 2012 — 8:00pm

I had so much fun teaching my first class at Whole Foods on Houston and Bowery here in NYC a few months ago that I’ve scheduled another one for next week. I’m sorry I didn’t post this sooner, because I hear it’s nearly sold out, but if you’re free on Monday, May 14th from 7-9, I’d love to see you!

The class is held in the kitchen where cooking lessons are given, and it’s a good thing because in addition to discussing the best in clean** makeup and skin care – and not just those sold in Whole Foods – we’ll also make one or two of our own facial treatments with products found right in your kitchen, and we’ll package them up so you can try them for yourself in the comfort of your own home!

**I can’t figure out which word to use to best describe products that are as free from potentially harmful chemicals as possible: green? non-toxic? healthy? natural? you get the picture?

You can click HERE to register.

My friend photographed and shot video of the last class (thank you, Michelle!)  and the most fun images were taken during the eyelash curling session. I love watching the delight on each person’s face when they see how wide open their eye looks after I teach them how to curl.  It was such a hit that I’m sure we’ll do it again on the 14th.

Some shots from my makeup/skincare table:

…and a little video for your viewing pleasure (again, thanks to my good friend Michelle for shooting and editing). Does anyone know how to keep the advertisements from popping up along the bottom of it? Darn ads!

Another big thank you to my friend, and model, Tanya Sweet, who looks amazing in a red lip!


Comments Off on join me for my next class at Whole Foods in NYC: Clean & Green Makeup and Skincare! | ...We're all connected

VOGUE.com features my guide to going green for Spring!

April 19th, 2012 — 11:08am

I couldn’t be more excited to share this article from Vogue.com:  Makeup Artist Katey Denno’s Guide to Going Green for Spring

I really believe in the brands I recommend in the article, and have actually had the pleasure of getting to know some of the people behind the different product lines, as I always want to know the story-behind-the-story of how they got their start, and what keeps them going.

A HUGE thank you goes to the beautiful and brilliant Catherine Piercy, Beauty Editor at Vogue.

Thanks to photographer Jason Brownrigg for snapping these shots while I was working last week, and to the lovely model McKenzie Raley for sharing the photo with me.


Comments Off on VOGUE.com features my guide to going green for Spring! | ...I love this

A youthful spirit with a face to match (& some products I use to accentuate that youth)

March 30th, 2012 — 7:52am


Susan is one of those women who is constantly busy doing interesting things, with interesting people, for interesting causes. I always learn something about the humanitarian efforts around town and around the world when I see her. I can’t say I’ve learned how to be a great ping pong player since I’ve known her, but I have tried my hand at it while at her well-known ping pong club, Spin.

One thing I have learned (through some trial and error, I’ll admit) is to use about 80% cream makeup products on Susan, relying on powder only for eyeshadow – which is always blended well and smeared along the edge with my finger or a q-tip -and the teeniest little bit of translucent powder on her T-zone to set her foundation. This months’ Allure Magazine has a great article complete with makeup tips and tricks from makeup artists on how to look your most youthful, which aren’t really applicable to the youngest models with whom I work, but for anyone in their very late twenties on up, I think these are some good rules to follow.  I see Susan again next week and I’ll try to do a different look on her and blog about it soon, complete with a product shopping list. Did I mention that my mom and Susan bear a striking resemblance to one another?

This is what I used on Susan in the picture above:

Darphin Organic Jasmine Aromatic Care Oil (Smells delicious!)

Darphin Predermine Densifying Anti-Wrinkle Cream for Normal Skin (seals in the oil I just applied)

(I allow the above to settle into the skin for a few minutes before starting the foundation)

 Armani Face Fabric Foundation, SPF 12, This stuff will not settle into fine lines. I apply it very sparingly  – starting in the middle of her face and tapering off the further I get from the center – first with Armani’s natural bristle foundation brush, and then lightly tapped into perfect submission with the Beauty Blender, a perfectly textured and shaped sponge (that was just thoroughly soaked and squeezed dry in a towel)

MAC eyeliner in Teddy – one of the best in brown/black/gold (smudge-able and long wearing). Drawn along both top and bottom lashes and dotted inside the lash line, and then smudged with a thin synthetic brush to create no hard edges.

Lancome Color Design Quad Eye Shadow in Showstopper Style (this is the best set of shadows I’ve found that works well on so many different skin tones). I generally don’t use the lightest shimmery shadow in this quad (four different eyeshadow colors in one palette) on women over 45, as the highlight in the corner of the eye often looks overdone. Instead I use the tan shimmer all over her lid but not above the crease, as well as very softly under the bottom lashes before the liner, smudged with a q-tip.

Lancome Color Design Sensational Effects Eye Shadow Smooth Hold Matte in Mochaccino, which is a soft taupe-brown, which I use lightly along the outer edge of the lashes and gently fade towards the outer corner of her lid

Cover Girl Lash Blast Mascara in Very Black – enough to seriously coat the upper lashes

Kjaer Weis Cream Blush in Blossoming (one of the most incredible all natural  – 95% organic – makeup lines on the market. added bonus: beautiful refillable containers) I like to apply with a soft synthetic brush and then blend with the sponge in small taps.

Laura Mercier Lip Liner in Baby Lips – I first line her lips, and then fill them in with the pencil to help the color stay longer and appear more intensely.

Laura Mercier Creme Lip Colour in Tea Rose

Dr. Haushka Lip Balm in a pot, applied on top for a little added shine without any of the stickiness or reflectiveness sometimes inherent in lipgloss.


Comments Off on A youthful spirit with a face to match (& some products I use to accentuate that youth) | ...Here's how to

Christy Turlington sure did rock this red lip I gave her!

March 8th, 2012 — 1:30pm


Earlier this week I went over to Christy’s place to do her makeup for the premier of the all-star cast film called ‘Friends With Kids’, featuring her husband, Ed Burns. The last few times I’ve done her makeup we’ve gone with bronze skin and nude lips. Not this time.

Christy’s involvement with all things supporting the advancement of the status of women around the world – particularly through her organization Every Mother Counts (EMC) – is really inspiring to me. We discussed her upcoming trip to India with EMC, the seriously amazing list of singers who’ll be lending their voices to EMC’s newest benefit CD, and when we were deciding which outfit she would be wearing to the premier (I love this navy dress by Stella McCartney that she chose), we started discussing my blog, and tweeting, and Christy (a twitter expert) asked if I’d heard of ‘Rock the Lips‘, a group of women who came together to help empower women all over the world to help each other through the offering of micro loans. I was excited to hear about their mission as well as their suggestion that on International Women’s Day (which is March 8th), all women ‘rock a red lip’ in solidarity. We decided to honor IWD – and this exciting program – a few days early.

I didn’t have my entire lipstick kit with me (you wouldn’t believe how heavy a bag of 50 or 60 lipsticks can be!), but I knew I had a number of my favorite reds. After Christy settled on the dress, I knew the lip that would look the best would have a crisp edge, be as intensely pigmented as possible, and have a slight emollience to it. A well-hydrated, lightly exfoliated lip is of utmost importance when it’s going to be painted a pretty red. I was not the least bit surprised to find Christy’s in perfect condition.  Applying the color in layers and with different textured products, really keeps the lip looking good longer (my grandmother taught me this). The order of the products I used is just as important as the products themselves.

Here we go:


Here’s a pic that Vogue.com ran from the after-party. (Ed is much cuter in person than in this picture. Christy, however, looks incredible.)

Comments Off on Christy Turlington sure did rock this red lip I gave her! | ...Here's how to

My current bedside table must-haves.

March 8th, 2012 — 5:09am

I’m so sleepy, and I should be in bed, after having spent another long, but great day on set, and then going out to see a friend’s band play in the East Village here in NYC tonight. However,  I just walked into my bedroom, saw these products so perfectly – and accidentally – arranged on my bedside table, and thought: I have to share these tonight. The best part about them is that they’re all from companies who share a focus on creating products with natural, non-toxic, and/or organic ingredients. Go green beauty market, go!

I’ve been sleeping *so* well lately. I love falling asleep to the scent of Tata Harper’s Aromatic Bedtime Treatment (I often don’t even put it on me, I just inhale deeply from the bottle a few times and it gets my brain right into lullaby mode) , and waking to still enjoy the smell of my super soft skin, thanks to  the Dr. Hauschka Lemon Lemongrass lotion (not to be confused with the Lemon Oil, or Lemon Lotion – this is new and smells BEYOND incredible) and Rose Oil that I mix and massage all over me. But what’s closest to my bed, is one of my all-time favorites, and the last product I use every night. I never go to sleep in the Winter without covering my hands and feet with Weleda Skin Food, which keeps them baby soft. Everyone who works with me knows that I’m never far from a tube of this amazingly scented, super rich lotion. There’s one here, one in my work makeup kit, and one in my purse at all times.

I should finish tomorrow’s post on the amazing red-lip look I gave Christy Turlington to walk the carpet on Monday night, but I don’t think my eyes will focus for much longer! I promise to have that ready for you very soon.

If I can finish this post in the next 2 minutes, I’ll still have just enough energy and brain power to wind down by reading a few more pages of the Patti Smith book. Night, night!

Comments Off on My current bedside table must-haves. | ...I love this

Back to top